Photography and The Week Of AI, part i

This past year I finally got on the SEO bandwagon. SEO, for those who don’t know, is Search Engine Optimization. As in, how to get Google to look at you.

Get you a search engine that looks at you like…

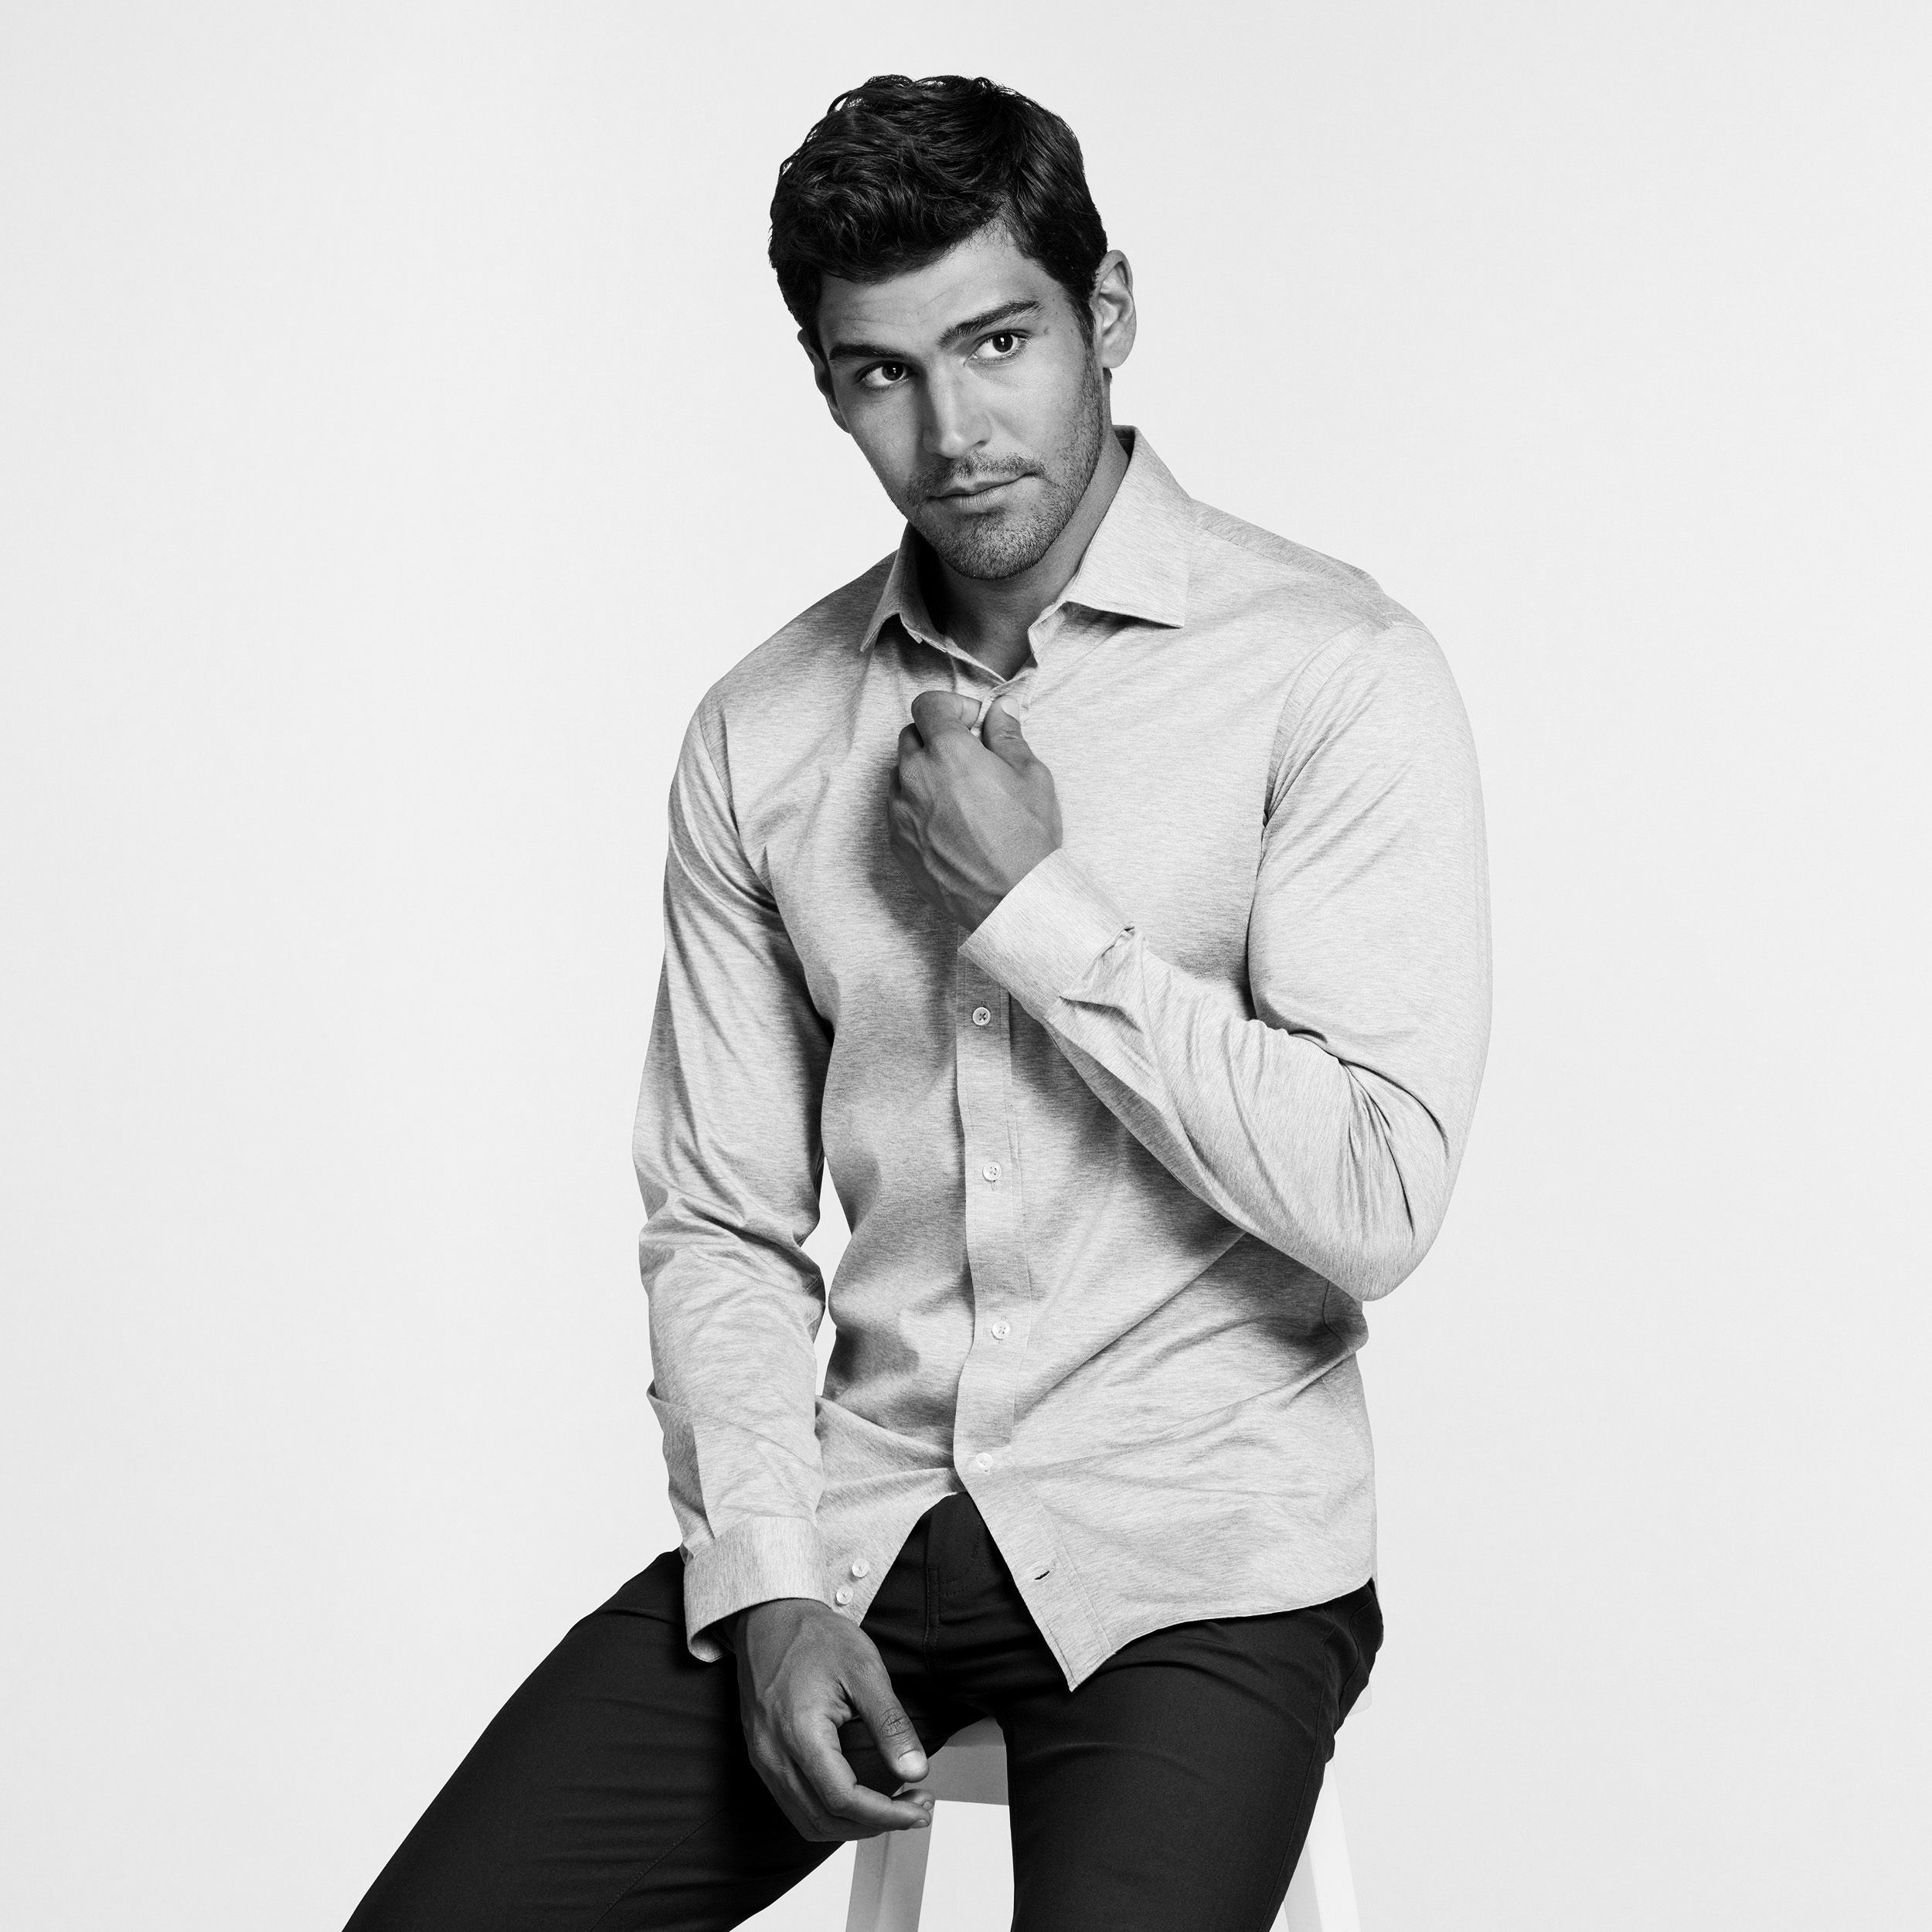
Bautista Zorio, Two Management

Photo by Sonya Bowman Photography

I had heard about SEO for years, but thought it just wasn’t for me. I’m a photographer, what more do I need out of a website than a place to show off my pictures?

Well it turns out that the Google bots can’t read pictures. They need words to know what you’re up to and refer searches your way.

When I first started working with an SEO team in India, I was taken aback by their suggestion to have AI write blogs for me. This website is my ethereal self, my representation to the world, how could anyone (or anything) write for me?

Eventually I was swayed to give it a try. The blog section is a key component for SEO success. So… low on time and eager to see results, I finally agreed to see what the AI blog would look like.

To my surprise, the AI blog was not awful. A little cold, perhaps - it’s hard to outsource Southern charm or California swag - but informative enough. More importantly, the AI blog showed how to use key word chains (hint: relentlessly) and how to build in links to direct back to the site.

My first blog, written from scratch, took me two weeks to complete. The next one, which is a highly edited AI blog, took only a day or two. Since then I use both. Sometimes I have a lot to say straight from my heart, and I can blog with the best of them. Other times, I polish up the writing and add personal passages to these basic blogs sent over by my SEO team to make them more relevant and readable. Both have their place, and I am happy with the results that I have seen.

Since I started working with the SEO team less than a year ago, my search results went from page 30+ to page ~3. I'm finally booking clients who found me through web searches, instead of just personal referral, which is how I have built my business over the past 2 decades.

For my next blog I will talk about how AI has already impacted product photography itself. That one will be all me, because I have a lot to say about it. But for now, I will leave you with this lovely blog written by our robot friends. It’s a perfect example of how to say a whole lot without saying very much at all.

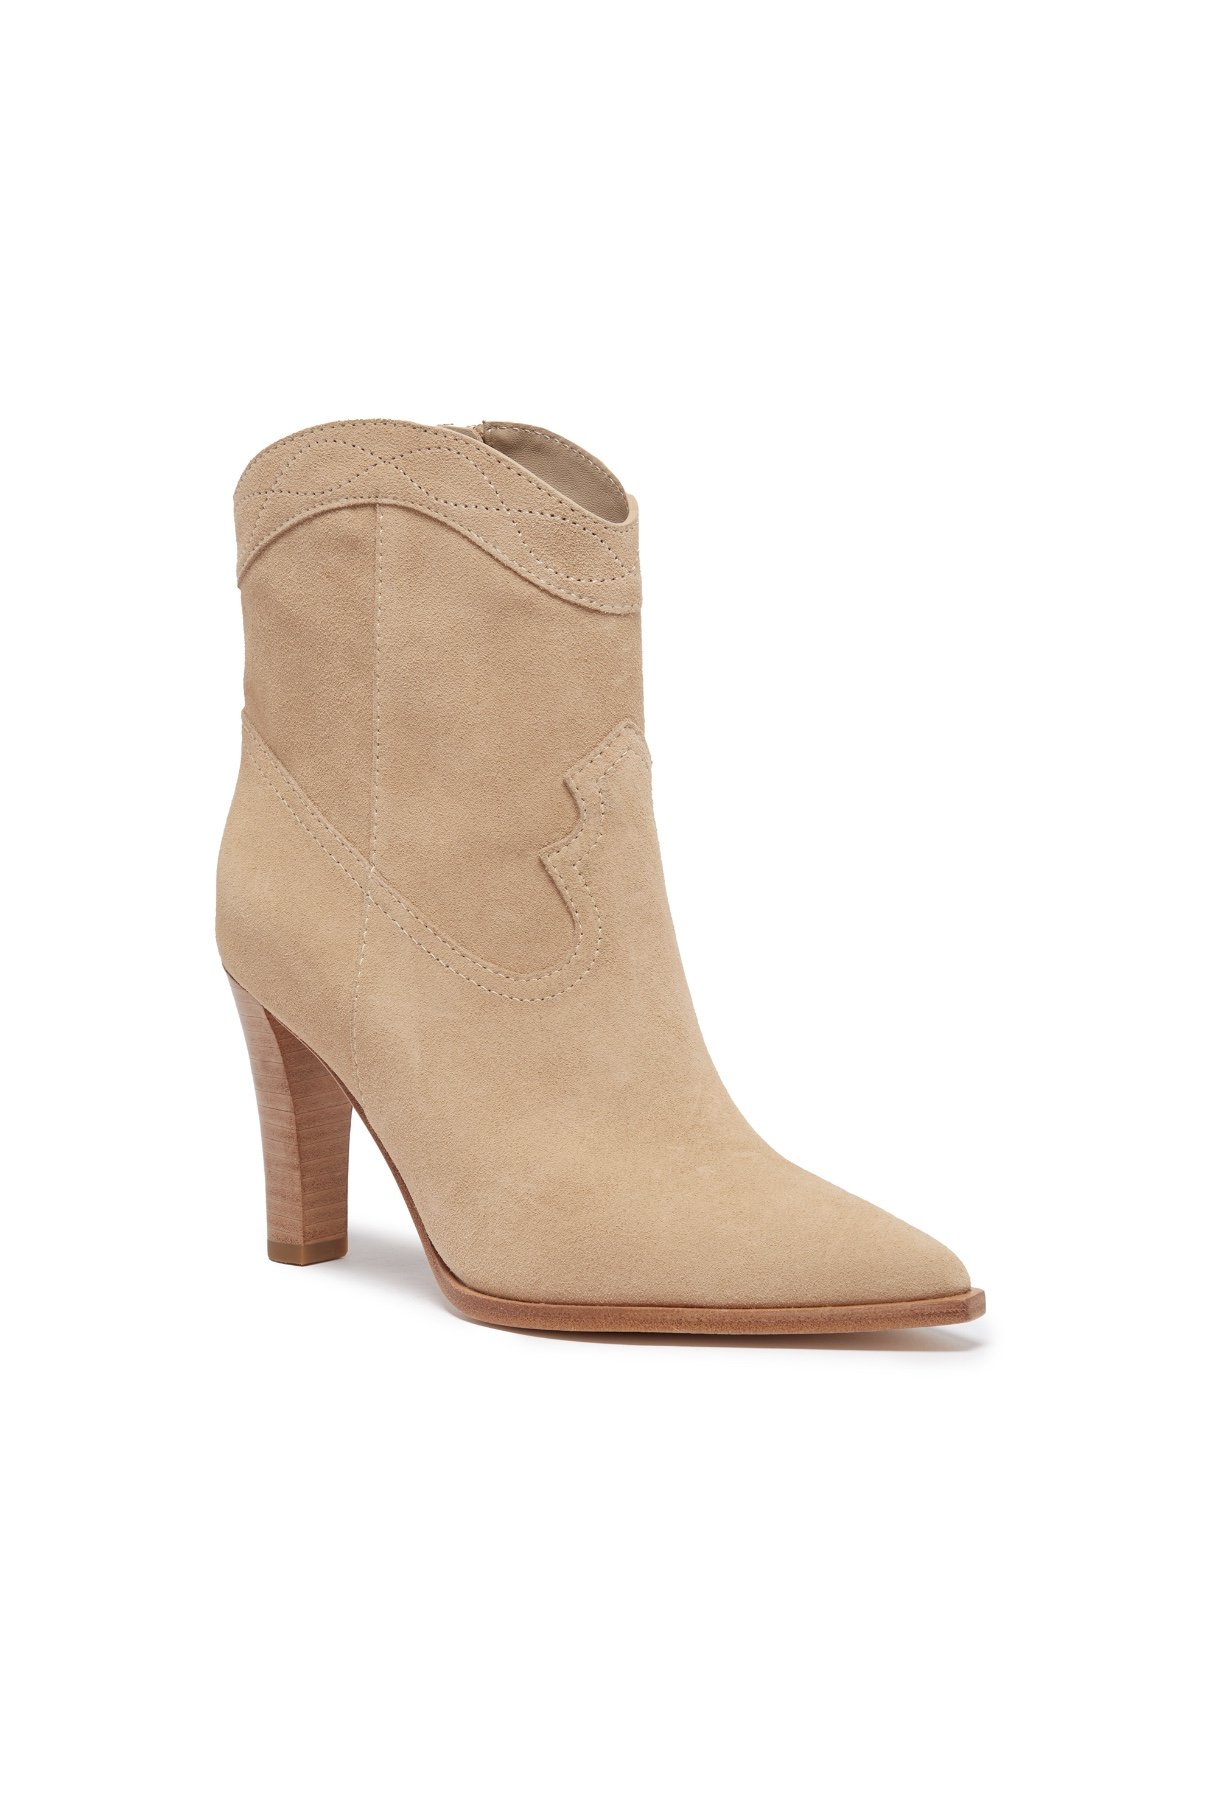
What is Product Photography?

Product photography is all about using the right lighting, angles, and styling to create beautiful images of your products. It allows you to showcase the features and benefits of your products in an engaging way, and it can also be used to create a lifestyle-oriented look for your products. In order to achieve the best results, product photographers will often use a variety of techniques, including the use of props and backgrounds, to create a unique and interesting look for each product.

Fenty Primer because Fenty Everthing.

Product photography by Sonya Bowman Photography

The Benefits of Product Photography

Product photography is an important marketing tool because it provides potential customers with a clear and concise representation of your products. This can help to create a sense of trust and excitement about your products, and it can also be used to help build your brand. Additionally, product photography can be used to showcase your products in a variety of ways, such as in print or online, which can help to increase visibility and sales.

Fragrance bottles ftw

Product photography by Sonya Bowman Photography

Tips for Creating Great Product Photos

If you are new to product photography, there are a few important tips to keep in mind. First, it is important to make sure that your product is clearly visible in the photo. You should also ensure that your product is well-lit, as this will help to draw attention to the details of your product. Additionally, you should consider using props or backgrounds to create an interesting look and feel for your product. Finally, it is important to choose the right angle for each product, as this will help to create the perfect image.

Telling a tale about muscle aches.

Product photography by Sonya Bowman Photography

Editing and Post-Production

Once you have taken the photos, it is important to spend time editing and post-producing them to make sure that they look their best. This can include color correction, cropping, and retouching. Additionally, you may want to consider adding special effects or filters to make your product photos stand out from the rest.

Don’t listen to the AI, product photography is a terrible time to use filters. Remove dust and scratches, clean up the reflections, adjust color and contrast, and call it a day. Product photography requires you to make the magic in camera.

Product photography by Sonya Bowman Photography

Product photography should be used strategically in order to create the desired effect. This can include using different angles to emphasize the product’s features, using lighting to bring out its unique details, or using props to create a story around the product. Adobe Lightroom and Photoshop are two popular programs used for product photography. They are used to adjust color, contrast, and brightness to bring out the best in each product.

Prop it up.

Product photography by Sonya Bowman Photography

Product photography is the art of capturing images of products to be used in advertising, catalogs, websites, and other forms of marketing. This type of photography is used to showcase products in the best possible light and to create a memorable impression on potential customers. Sonya Bowman is a professional photographer who specializes in product photography. She offers her services to a variety of clients, including small businesses, large corporations, and individuals.

Always striving to make a memorable impression.

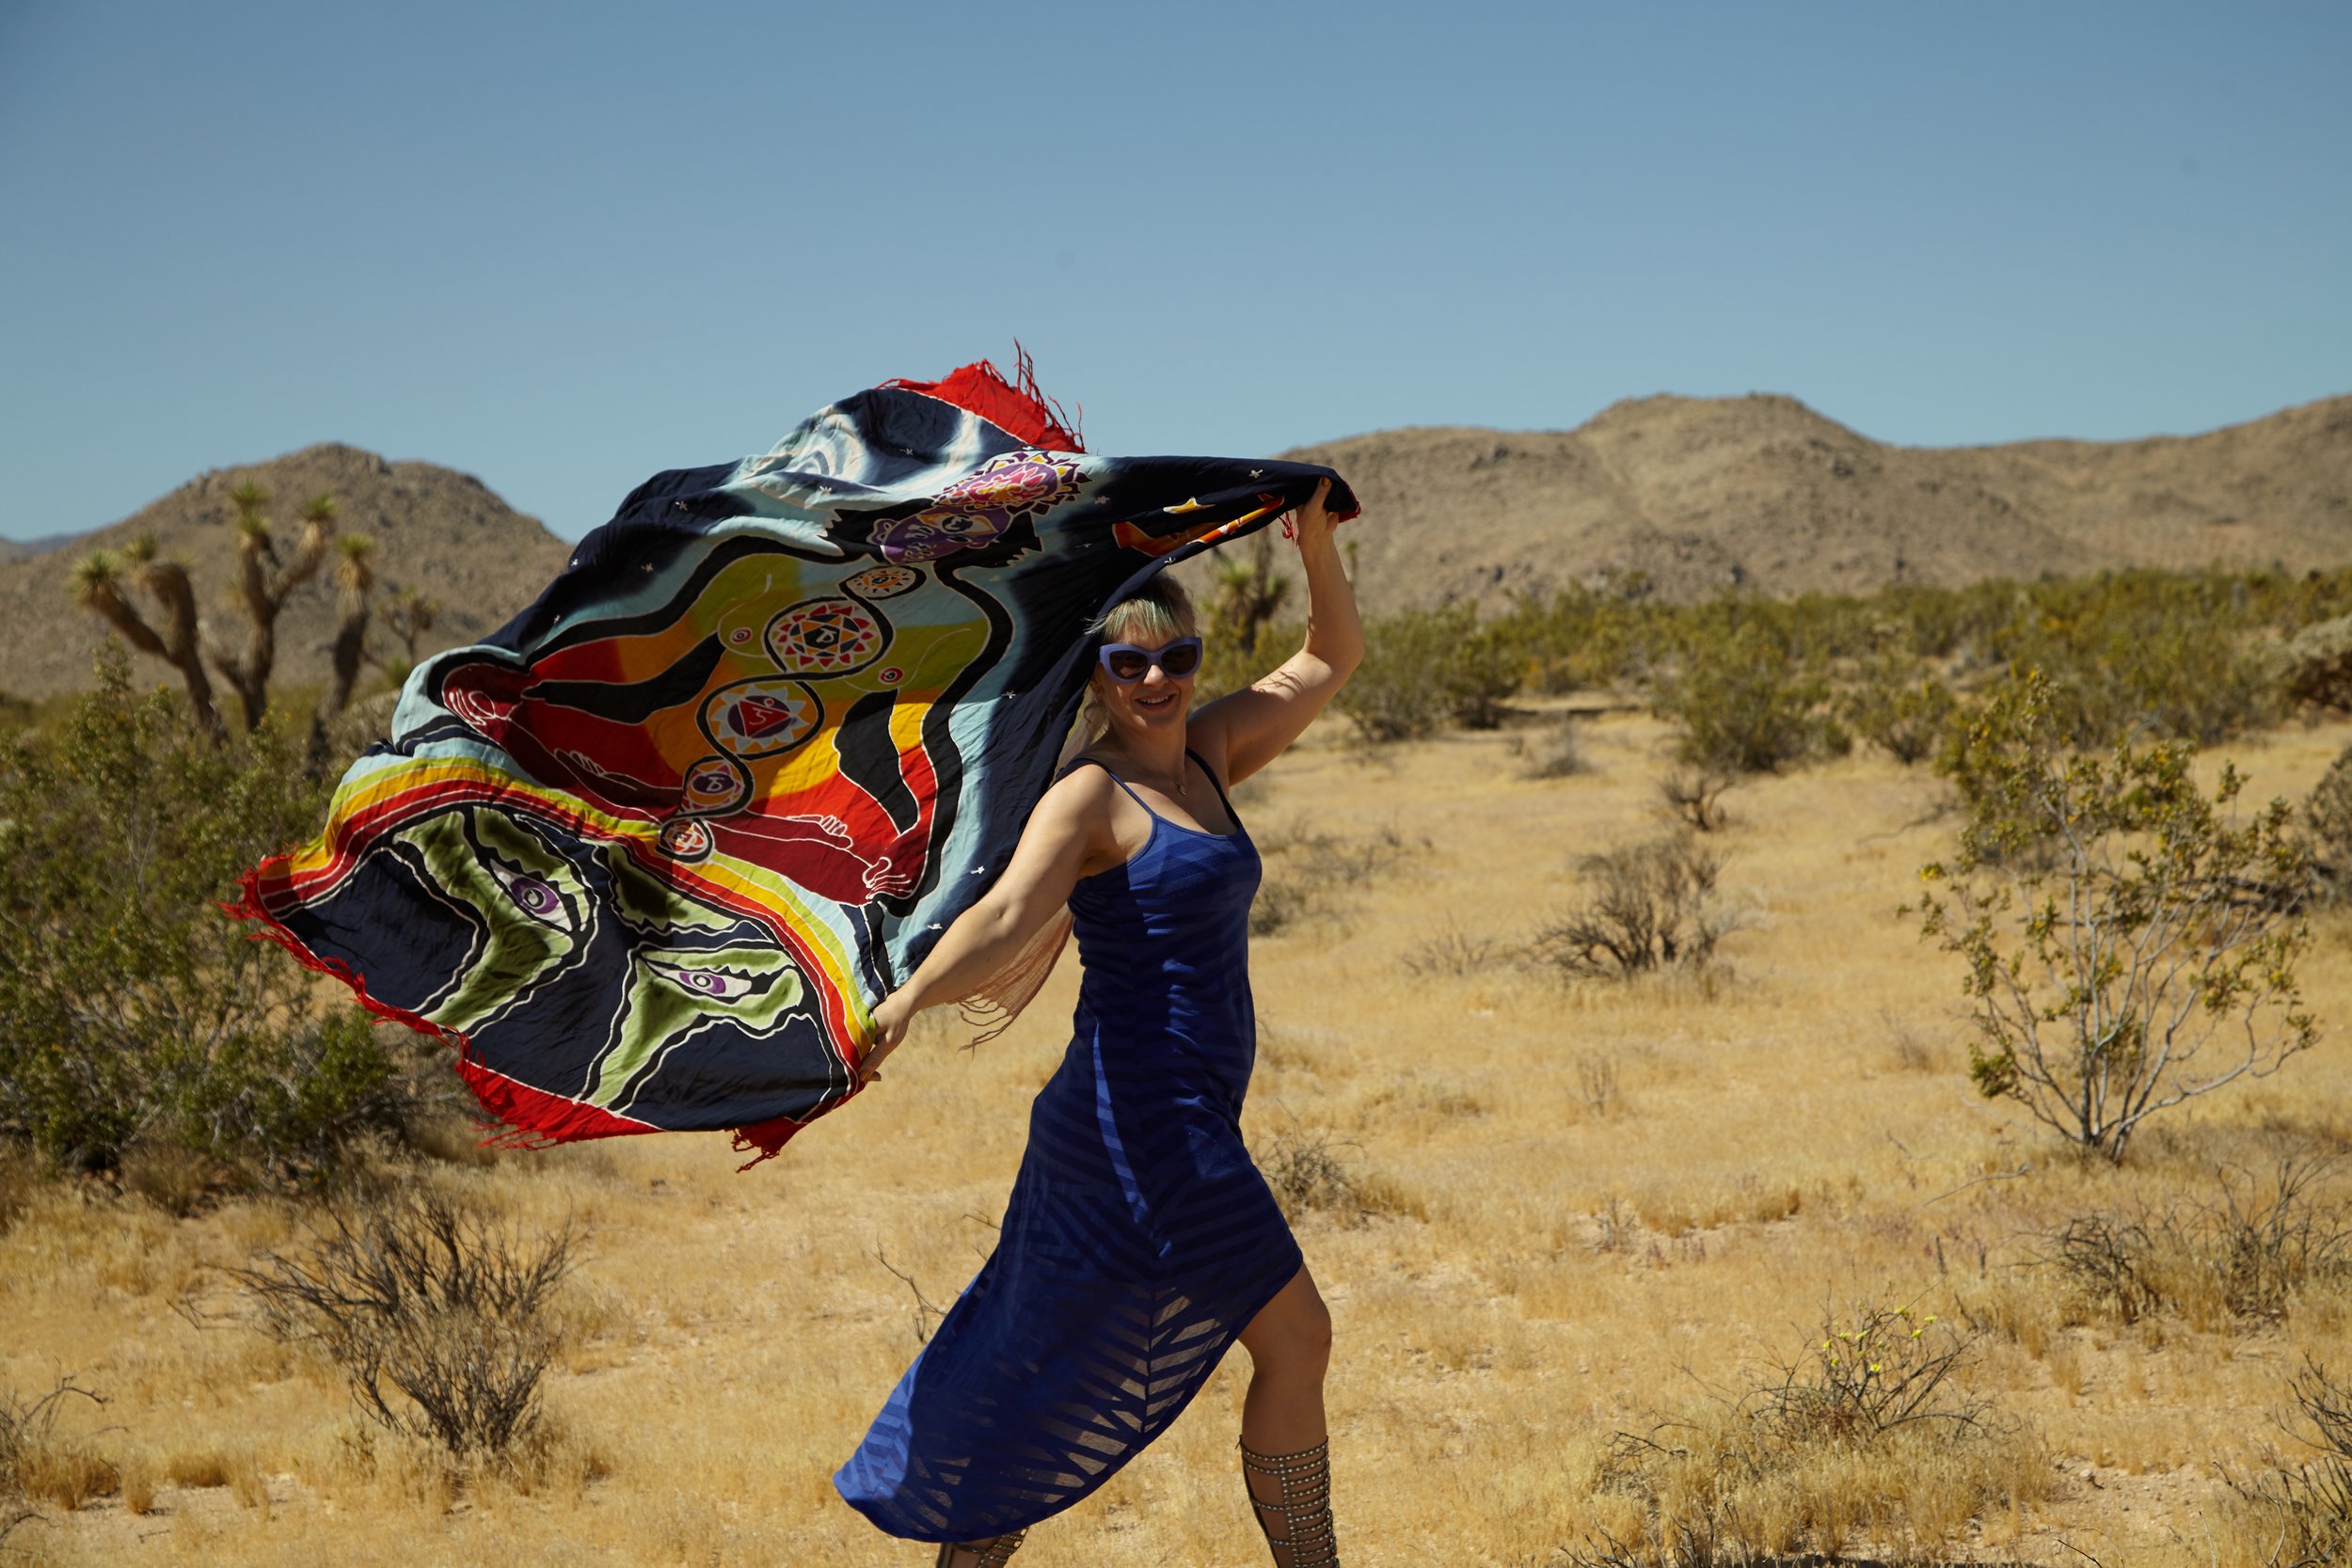
Sonya Bowman Photography in the wild.

Voyage LA Interview

It has been too long without a blog post! Just that busy time of year. Here’s an interview that I did with Voyage LA. They are doing a series featuring locals.

Wishing everyone a very happy holiday season and prosperous new year ahead!

http://voyagela.com/interview/conversations-with-sonya-bowman/

Conversations with Sonya Bowman

Today we’d like to introduce you to Sonya Bowman. 

Hi Sonya, thanks for sharing your story with us. To start, maybe you can tell our readers some of your backstories.
I decided when I was 13 that I would be a photographer. I had always been into art, and the technical components of photography appealed to me as well. I assisted area photographers in Atlanta and got my Bachelor of Arts degree at Georgia State University. Assisting was such an integral part of my journey as a photographer. I worked with photojournalists, fashion photographers, architectural photographers, wedding and portrait photographers, and even conceptual artists before figuring out my own path in commercial photography. 

I spent several years working in Dallas as a still life and food photographer for the catalog and advertising industries before relocating to Los Angeles in 2006. 

I loved everything about California, but 2006 was a difficult time to relocate. Those of us in creative industries felt the economic downturn before the big recession officially hit in 2007. Add to that the shift in the industry from film to digital, and many of us were sent scrambling, trying to find our way in the new landscape. 

These days I focus on product and fashion photography for e-commerce as well as headshots for actors and business professionals. I love that my schedule is so varied and that every day is different. Some days I’m glued to my camera, headphones in and hiding from the world while fidgeting with the fine details of jewelry. Some days I might be on location in Malibu, chasing light and having fun with colleagues. Another day I’m leading a full crew as we shoot fashion with models, hair and makeup artists, stylists, and producers. Although I enjoy all of those, portraiture has always held a special place in my heart. Getting to know someone, finding out what they want to convey in their headshot, and expressing that in a photograph is always a satisfying endeavor.

Alright, so let’s dig a little deeper into the story – has it been an easy path overall, and if not, what were the challenges you’ve had to overcome?
I would not say it’s been a smooth road, but it certainly has been a rewarding one. Photography is an industry that was dominated by men well into the 2000s, so even finding photographers to work with was difficult initially. I often had to offer my services as a cleaning/organization person to convince some photographers to give me a shot. I can’t tell you how many studio bathrooms I’ve cleaned, how many grip rooms I’ve organized, how many personal errands I’ve run, just to be near photography. Even after establishing myself as a camera assistant and then as a photographer, it was a tricky business master, particularly working freelance. For many years I worked full-time at in-house studios because the ups and downs of freelance work was too stressful for me. The freedom to make my own schedule was far too appealing to give up that dream, though. I had to acquire an entirely new skill set to be able to run my own business, so there were certainly growing pains along the way. Anything worth having is worth working for, and since I love what I do, even the long days don’t feel like a burden.

Can you tell our readers more about what you do and what you think sets you apart from others?
I love that photography is a collaborative endeavor. Everyone who works on a photo shoot brings something to the table. The phrase “teamwork makes the dream work,” is a genuine motto for photographers, we do not work alone, so I surround myself with talented professionals who have a good sense of humor to see us through the long days on set. As for what sets me apart, I would say it is my lifelong dedication to the craft. I continue to do “test shoots,” which are unpaid collaborations to work out new ideas. I remain inspired by taking in art and always listening to music.

What were you like growing up?
My imagination was boundless, I had a whole life that I lived out in the woods behind my house, an entire story that only I understood. I was always interested in art. I loved to draw, paint, and make things. I also loved reading and was a dedicated student, but I was also an outsider. I discovered I felt more powerful wearing black in 7th grade and it is still my go-to look. In high school I started watching Star Trek: The Next Generation, which was huge for me. There I saw people who left their homes to go off and pursue their own dreams, and I realized I could leave my small town and do what I wanted, finding other like-minded people along the way.

Contact Info:

See the full content and more lovely pictures at http://voyagela.com/interview/conversations-with-sonya-bowman/

If you want to see more examples of my portrait and headshot photography, please check this link: https://www.sonyabowman.com/headshots

Bring the Action

One of the reasons that fashion photography is so compelling is because the images capture a moment. The model is moving, they are interacting with their space. It is a slice of life – a fantastic life – that feels like a window into a different world.

Fashion photographers have many elements that come together to create a beautiful photograph. There is the gorgeous model, the excellent clothing, the dynamic background, but it is the movement that brings that image to life.

Most of these components are similar for product photographers. Product photography has a gorgeous subject, interesting props, and engaging backgrounds. The one thing a product photographer does not have at their disposal that fashion photographers do have is the ability to direct the subject to move.

All is not lost for product photographers, however. Product photographers can introduce movement to their images, too. Not in the same way as fashion photographers, obviously, but there are options.

©Sonya Bowman Photography 2022

One thing a product photographer can do is to bring action to their still life photographs is to introduce a moving element. Setting up this shoot for JVN hair products, I wanted to try a shower effect. The product itself is utilitarian. Even with a pretty background and beautiful lighting, the photograph was still not very compelling. By introducing water to the image however, things got a lot more interesting.

I shot this image in bright, outdoor light. I wanted to use a fast shutter speed to stop the movement of the water and capture individual droplets, but to have a very wide depth of field so that they background would drop out of focus and not be a distraction from the stars of the show.

©Sonya Bowman Photography 2022

Here is another example of adding a moving element to product photography. For this still life photograph of tea, I chose a setting with a cozy environment. The glassware really popped off the dark surface of the table. I placed everything in a pleasing arrangement and created a beautiful lighting setup. It wasn’t until I brought in the boiling water, however, that the picture really came to life. Just the steam rising from the cup was all that was needed to change this picture from a basic product photograph to a compelling still life image.

Another option for a product photographer who wants to add movement to their image to put the product itself in motion. For this image of Fenty’s Fat Water, I had yet another product that in itself was simply not that compelling. Even with a gorgeous setting and beautiful light, there’s only so far a photographer can take a simple plastic bottle.

©Sonya Bowman Photography 2022

I had this idea for dropping the bottle into water, but moving the product is definitely a team effort, as capturing the photograph at the precise right moment is the key. I worked with stylist Kourtney Bailey to create this image. A great stylist brings more than just an extra pair of hands to the photo shoot, however. Kourtney had a few tricks up her sleeve that made this photograph work.

While it may look like water, we were actually shooting in liquid glycerin. Glycerin has a much higher viscosity than water, almost like corn syrup. It moves slower, so it is easier to capture the movement. Because glycerin is clear like water, it easily disappears in a photography, so we added a turquoise fabric underneath the glass baking dish we were shooting in. In the end, the viewer just recognizes a bottle being dropped into water, completely unaware of the smoke and mirrors that goes into creating dynamic still life photography.

I hope you’ve enjoyed this blog on how to bring action into product photography. If you would like to see more examples of still life and product photography, please check out my website at https://www.sonyabowman.com/still-life


Still Life Photography For Advertising

Still life photography has its roots in the art of still painting. To break it down a little further, there are 4 broad categories of art: Landscapes, portraits, still life, and abstract. Within these categories are different styles and genres, but essentially it means that the picture is either of scenery, of people, of objects, or conceptual depictions of any of those things.

Still life refers to images which depict objects in an arranged composition. For art, the still life may focus on the essence of the objects as symbols for ideas and thoughts. For the purpose of advertising, however, still life is much more straightforward – to display a product and all of its characteristics. There is a psychology to the way humans relate to images and artwork. In advertising those fundamentals utilized to facilitate the selling of products.

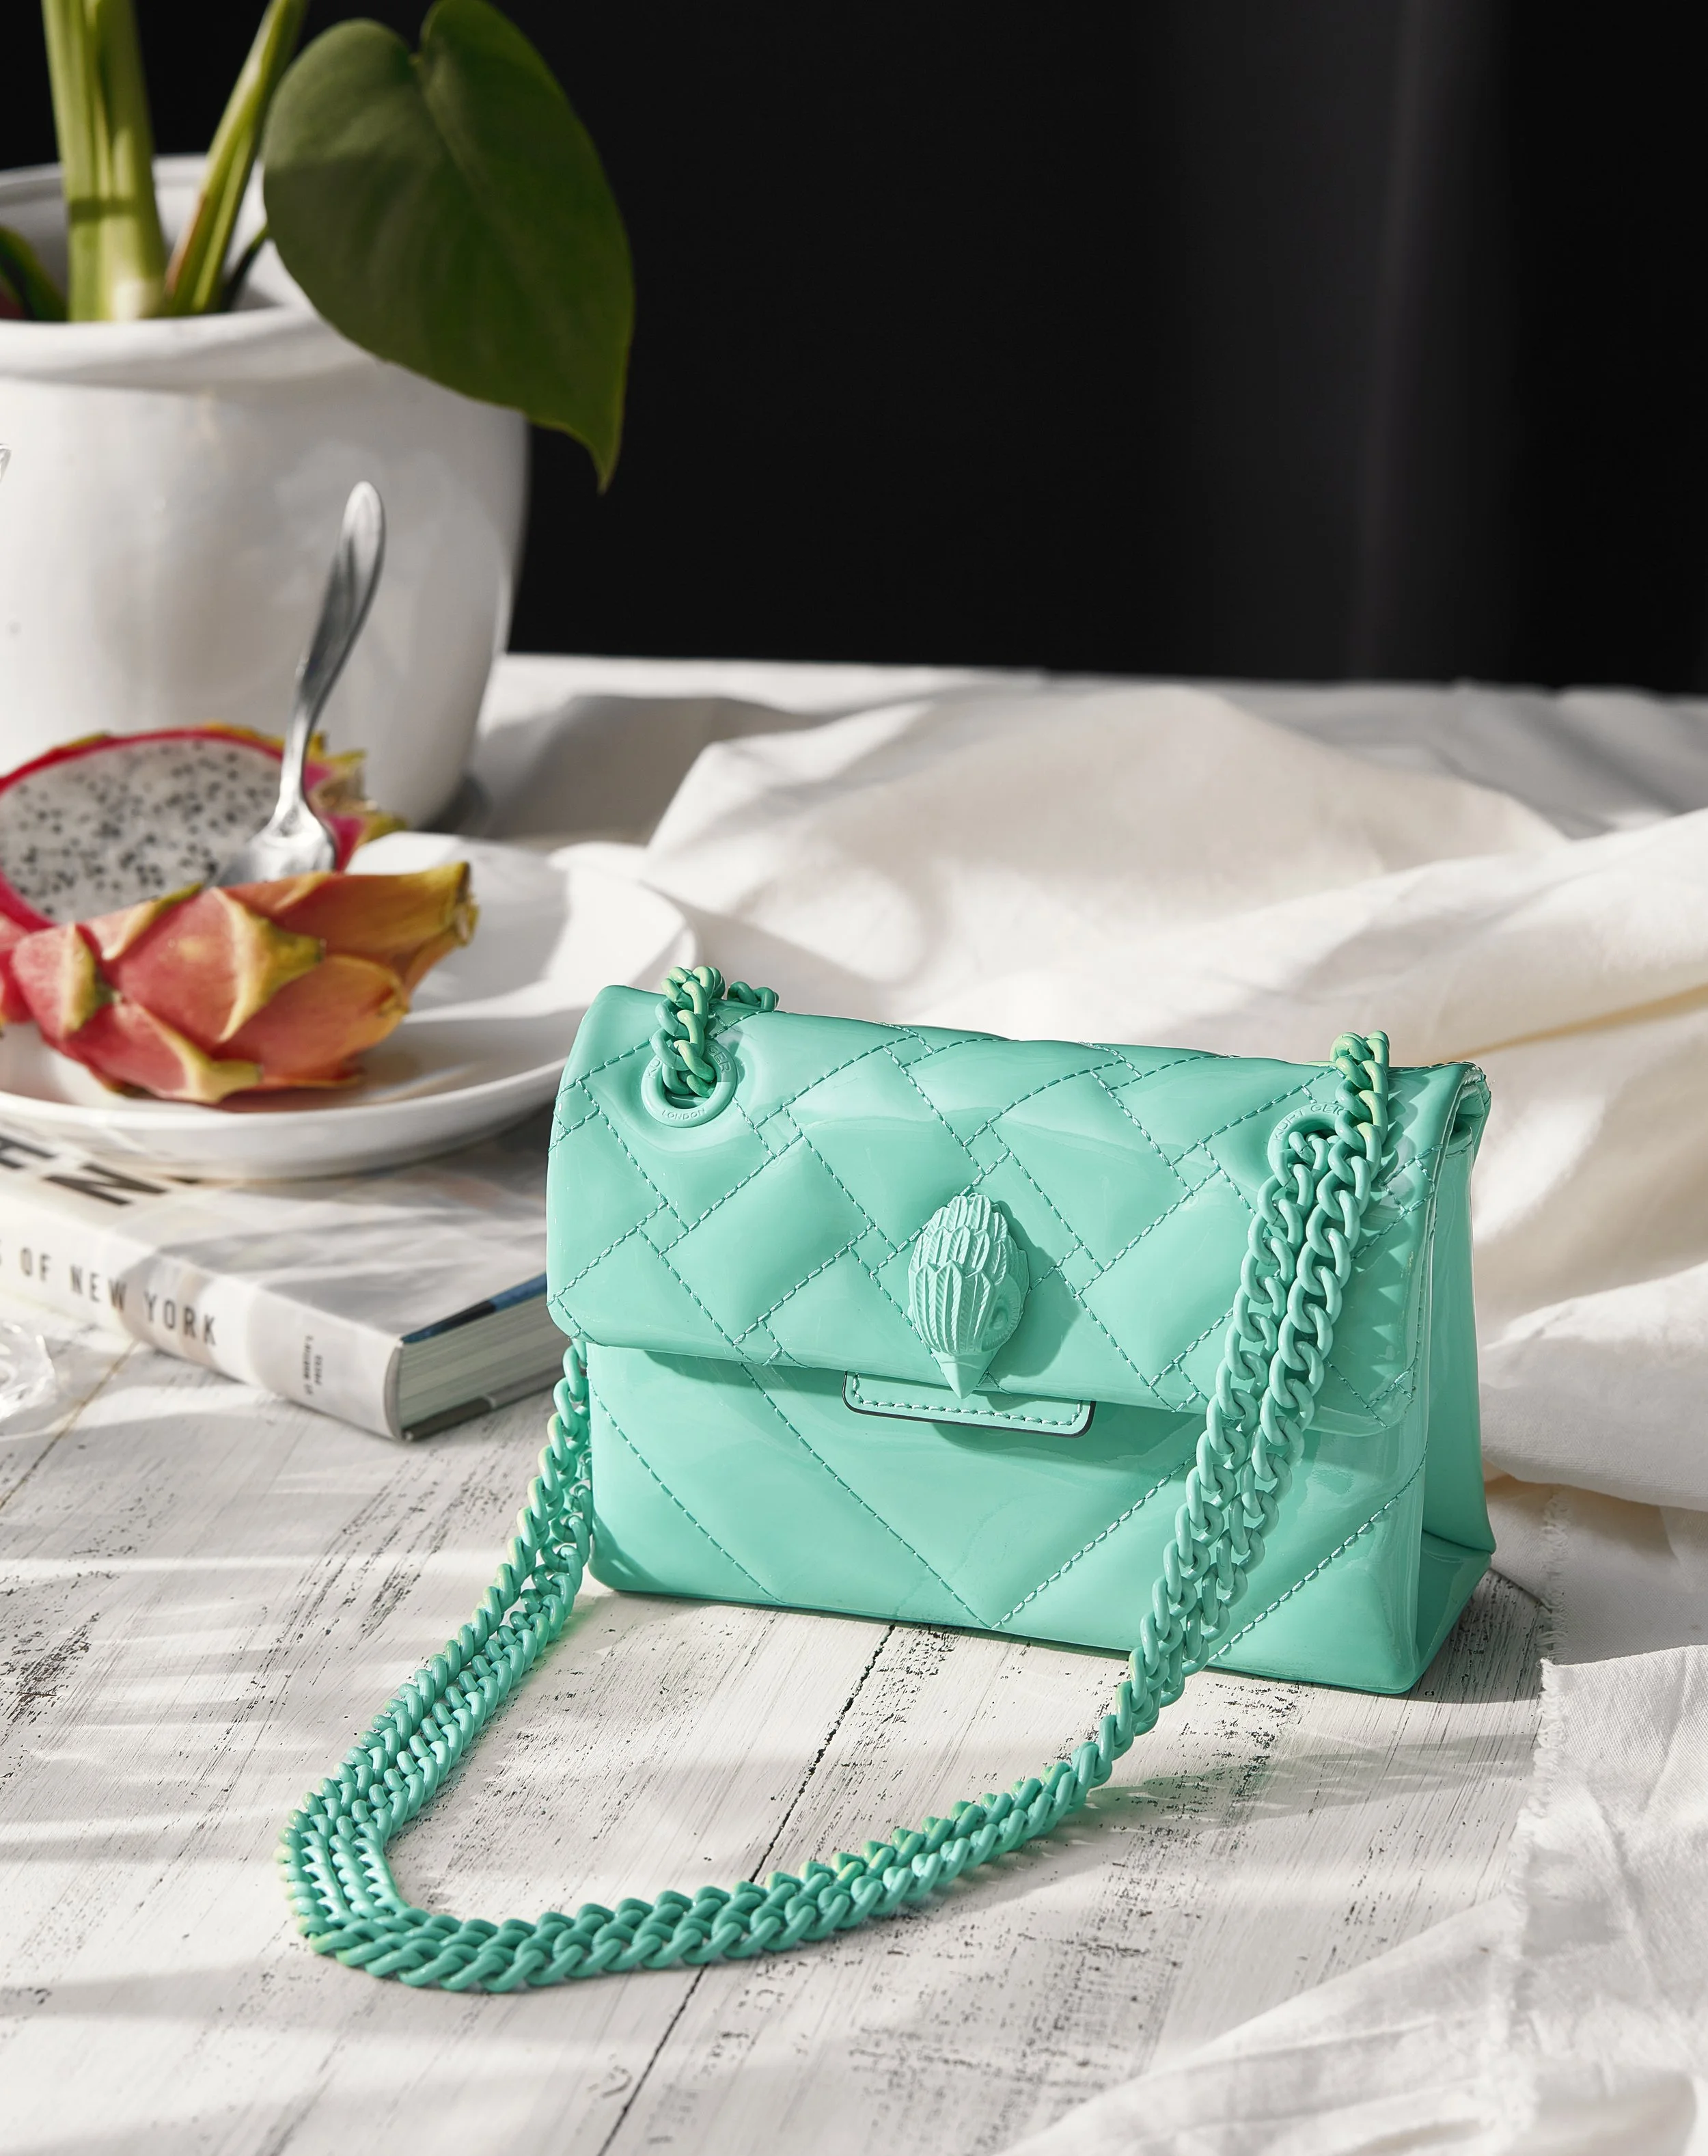
Kurt Geiger Turquoise Handbag, © Sonya Bowman 2022

The Role of Still Life in Advertising

Still life photographs are the cornerstone for print advertising as they allow for products to be portrayed in an accurate and eye-catching manner. When used in advertising, still life images have the ability to communicate a great deal of information about a product in a single frame. In just one glance, a viewer can take in the shape, color, and texture of an item, as well as any important details such as branding or usage.

Still Life for Advertising Versus Catalog or Ecommerce

What separates still life photographs used for advertising from those that might be used for a catalog or website? The primary difference is playing into that psychology referenced earlier. While Ecommerce is most typically shot on a white background with the goal simply displaying form and function, images for advertising have a much bigger job. Still life photography for advertising must motivate the consumer toward making a purchase.

To that end, the advertising agency will identify the desired consumer, and work with the brand to develop a language which will speak directly to them. For products that are intended for middle aged affluent people, the images will look different from those targeted toward teenagers. Color theory, typography, composition, and propping all play a role in creating an image that draws in the consumer, suggesting a desirable lifestyle and generating a sense of, not just want, but need.

Fenty Fragrance, © Sonya Bowman, 2022

Getting Started in Still Life Photography

When it comes to still life photography, the possibilities are endless. There are so many things that you can use to create interesting and unique compositions as you hone your skill set as a photographer.

One of the most popular objects to photograph is fruit. Fruit is colorful and eye-catching. You can arrange it in a multitude of ways and experiment with different lighting techniques to create stunning images. Fruit is also a mundane object, most humans interact with fruit in some capacity every day of their life. How do you show it in a new and unexpected way?

Another popular option is flowers. Again, flowers are colorful and eye-catching, but the light moves through them differently than fruit, so they make another great starting place for photographers looking to develop their lighting techniques.

Whatever inanimate objects you have around you – books, bottles, or even furniture – are great starting places on the path to becoming a still life photographer. The key is to experiment and see what works best for you.

Once you have honed your lighting skills on inexpensive and readily available items, consider purchasing designer or branded goods. For photographers who may not have a client list yet, putting recognizable products in their portfolio will demonstrate to potential customers that they are at least in touch with relevant and current brands.

Suggested products for the aspiring still life photographer:

Makeup

Bottles (booze or otherwise)

Handbags

Shoes

Clothing

Tech/Computers

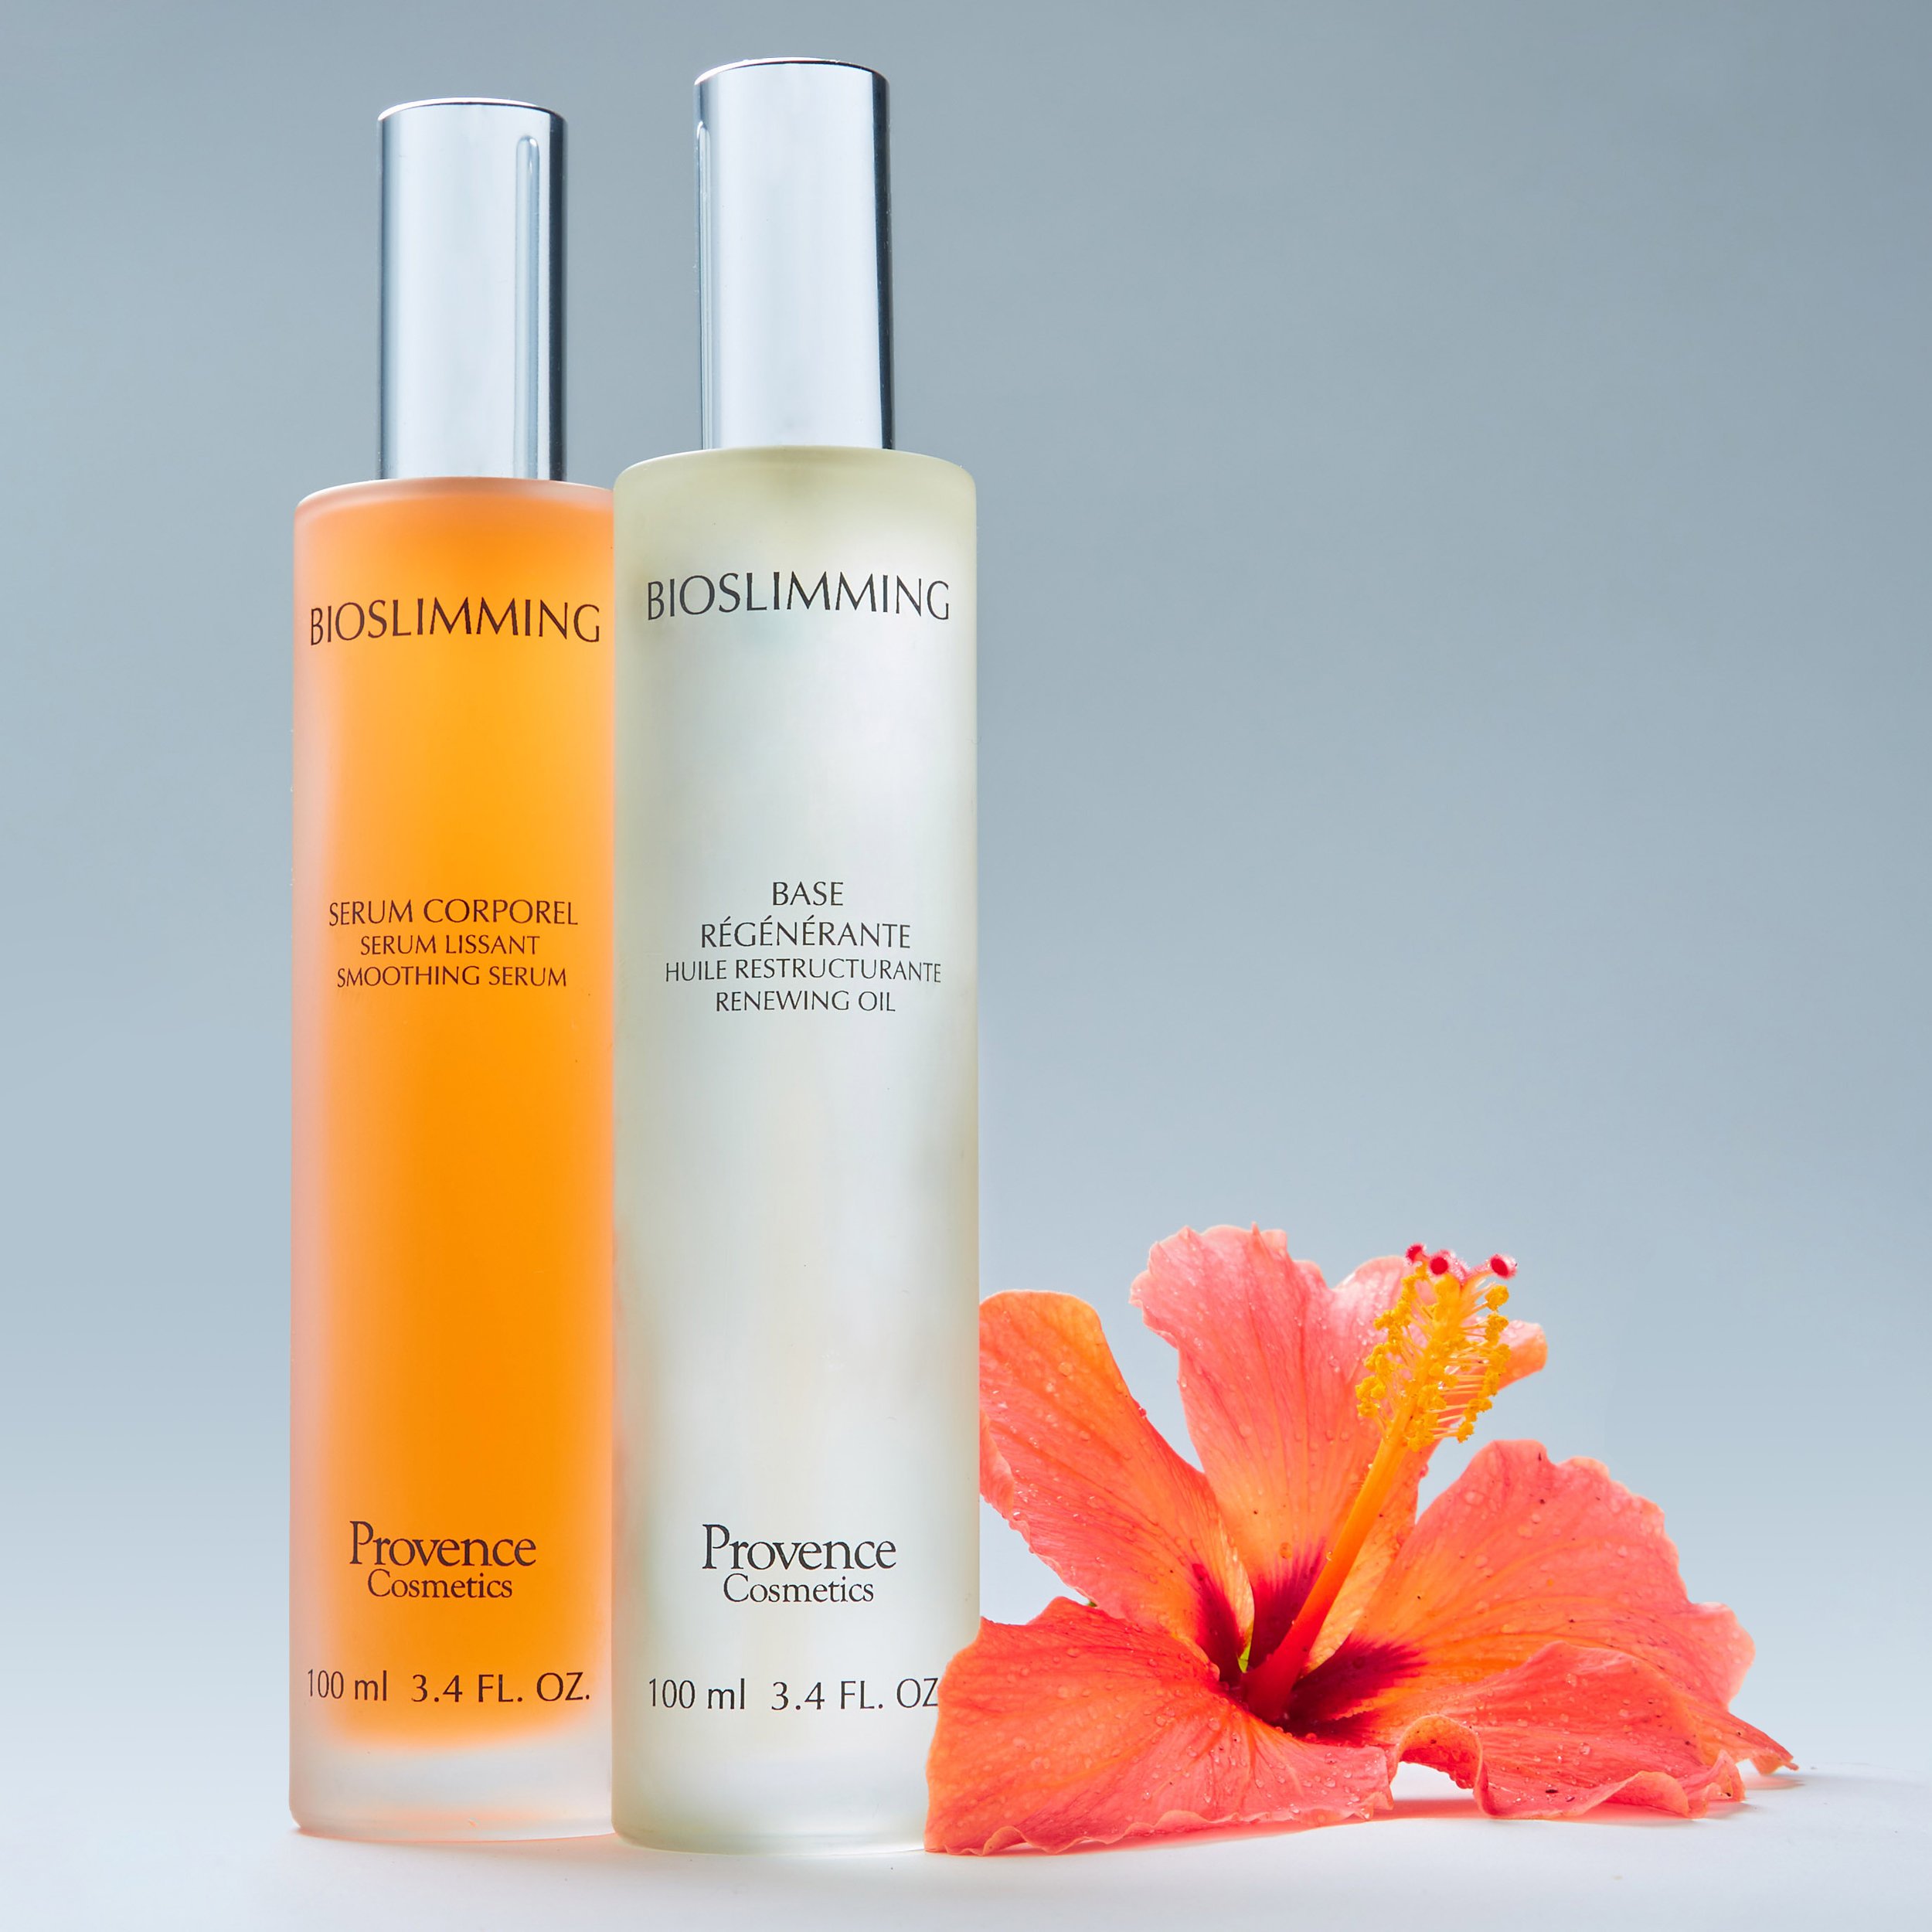
Provence Cosmetics, © Sonya Bowman, 2022

Tips on Still Life Advertising

If you're a product photographer, there's a good chance you've been asked to photograph still life for advertising purposes. It's a common type of photography that is used to sell everything from food and drink to clothing and cosmetics.

So, what does it take to create successful still life advertising? Here are some tips:

1. Know your audience

Before you start planning your shoot, it's important to think about who your target audience is. What kind of products do they buy? What do they respond to in terms of visuals? Answering these questions will help you determine the style, tone and overall approach to your shoot.

2. Keep it simple

While it's tempting to go all out and create an elaborate set-up, sometimes less is more when it comes to still life advertising. A few well-placed props and a clean background can often be more effective than a cluttered scene.

3. Use dynamic light

Natural light will give your photos a warm, inviting feel that can be quite perfect for social media and lifestyle shoots. If you're shooting advertising, however, you are really going to want to lean into studio lighting. This is not to say that you must use a bunch of lights, even one light can get the job done if it is used appropriately, but the lighting is not something you should leave up to chance.

4. Pay attention to detail

In still life photography, details matter. From the way the product is arranged in the frame to the lighting and shadows, every element should be carefully considered. By paying close attention to details, you ensure the viewer doesn’t get stuck on the wrong thing. Make sure every item is perfectly clean before starting. Wear gloves if you are shooting anything with metal, glass, or even plastic to avoid getting fingerprints on the item. Watch out for dust that may be especially prominent in the lighting.

Conclusion

I hope you’ve enjoyed this article about Still Life Photography For Advertising. With some creativity, careful planning, and technical skill, you can create still life photography worthy of advertising. Please have a look at https://www.sonyabowman.com/still-life for more Still Life photography ideas.

E-commerce Photography Services In Los Angeles

When meeting new people, the topic of conversation will often shift toward careers. “What do you do?” is the question. Answer with “I’m a photographer,” and the most common response will be, “Oh, like weddings and stuff?”

It’s a fair question. Since most people only hire photographers for major life events, such as weddings, mitvahs, and the occasional family portrait, they assume that all photographers are that type of photographer.

My answer is “I’m a commercial photographer.” While special event and portrait photographers earn their fees being present for those special occasions and selling prints after the fact, my photography is made for commercial applications. That means people hire me to take pictures of things that they are selling. Whether it’s shoes, handbags, jewelry or clothing, I am most often shooting products, not people.

E-commerce photography for Susu Handbags

What is E-commerce photography?

E-commerce, or Ecomm for short, refers to on-line retailing. Instead of a storefront there is a website. Some brands are large enough to have their own websites, or they may sell their products through online retailers such as Amazon. E-commerce photography is the process of taking pictures of products that are being sold online.

Oftentimes small business owners start off by taking the pictures themselves. You can see plenty of examples of this on websites like Etsy. Over time, however, if the company is a success, the business owner will start hiring a professional photographer. Why? For one thing, photography is a time consuming endeavor. It’s not just the photography itself, but the building of a set before the photo shoot, the shoot itself, and the retouching after the shoot.

Second, and more importantly, is the quality of the photographs that professionals can provide. An iPhone can produce impressive results, but it is nothing in comparison to a skilled photographer using the right lighting equipment and other tools.

As with all things photography, there is a visual language for e-commerce photography. Customers are used to seeing things in a particular way, now that so many of us are accustomed to shopping online. So the third thing that separates a professional e-commerce photographer from an amateur photographer/business owner, is that the e-commerce standards are already part of a professional photographer’s skill set. We’ll get into those specifics next, but it should also be mentioned that on-line retailers have image standards that an amateur is simply unable to produce. Amazon used to be more permissive with their image requirements, but these days they demand professional quality photos for listings.

What are the E-commerce photography standards?

When you think of e-commerce, think of Amazon. The main image is always on a white background. There may be numerous angels of the product on the white background, there may be images of the product in an environment, and there may even be videos of the product in action. But the main view is on white.

Shooting a product on a white background may seem easy enough, but in fact, it can be difficult to achieve. The white background may wash out the colors on the product. If you add enough lights to make the background go white, the product will then be too light. There will also be shadows going in different directions. Not a good look.

What is a photographer to do? Well, there are many different ways to achieve the same end, but the standard relies on clipping. Clipping simply means removing the background in a photograph. What I do is to put the product on a white background, and set up the lighting to enhance just the product itself. Then, when I am finished with the shoot, I will retouch the product to remove any scratches, harsh highlights, or anything that might distract from the beauty of the product itself.

After that I send the images to a retoucher who clips them out. From that point, the background can become whatever it needs to be. Typically that is white, for Amazon and many other on-line sellers. For companies that are looking to establish their own branding, however, the background may be light grey, or even a soft taupe.

Realistic shadows can be added in this stage of retouching as well. Shadows make the product look like it was originally on that white background, even though it would be impossible to get a pure, white background with a perfectly lit product in camera. What’s important is that the pictures look believable. People want to know the product they are looking at is what they will receive after a purchase.

An example of environmental, or lifestyle photography

Second to the main product shot on white is an environmental shot. These are sometimes called lifestyle images. If the product we are selling is a blender, there will be the main image on white, and then perhaps some alternate views to show off details and features. Next there will be a lifestyle shot.

As the name implies, a lifestyle shot depicts the product as it would be used in the customer’s real life. For the blender example, the there would be a small set built to suggest a kitchen. The blender would be propped with colorful fruit. There would likely be a cool glass filled with a smoothie nearby. Lifestyle images show the product in use.

Lifestyle images are often what is used in advertising, on product packaging, or even as the lead image on some e-commerce websites. Amazon may require that the first pictures of the item is the main view on white, but not every e-commerce website does things the same way. For some on-line retailers, they may opt to keep the product pictures on white as the secondary views, and use the lifestyle image as the main view.

In addition to the clipped out product shot on white, and potentially some lifestyle images, many e-commerce retailers include videos of their products. Why? Primarily to fill in any questions that a customer may have to help them make a purchase decision. Going back to that blender example, the main view may be the front shot of the blender itself. Secondary images might be the control panel, the blades, the lid, and even the cord wrap underneath. For most customers, these views will be sufficient, but some people feel more convinced when they see the item in a 360 view. It’s like they are in the store and can pick up the product and see from all angles. Studies show that more images and including videos leads to higher sales. If a company has budget, it is always best to do all three.

A callout for e-commerce clothing photography. Clothing can be shot both on figure (worn by a model) or “product” style. Product photography of clothing can be shot in a number of ways. T-shirts and simple styles may be laid out on a board and shot from overhead. A more elegant solution, and the standard in general, is a pinning board. A product stylist will pin the garment to a board designed for the purpose. In this way, the garment can be styled in such as a way as to look as natural as possible. The final option is called the “ghost mannequin.” The mannequin is dressed with the garments, then the mannequin is removed in the retouching stage. This a great solution for many, but not all garments.

Two examples of product photography for clothing - ghost mannequin and pinning board

How to Choose an E-commerce Photographer

When choosing an E-commerce photographer, it is important to consider a few factors. First, you will need to decide what type of photography you would like. There are many different types of photography for e-commerce, as discussed above. Some photographers specialize in capturing images on white, but aren’t prepared to build out a set and provide propping needed in a lifestyle image. Some photographers do not have the tools needed to shoot 360 degree views. Many photographers who specialize in on-figure/model photography are not set up to shoot product images.

When you look at a photographer’s website, you should be able to see examples of all the different types of photography you will need. If you want all three types of photography, the photographer you hire should be showing all three types.

Next, you will need to figure out your budget. While a family portrait session may cost $300, you won’t get far in product photography with that kind of money. Why? Part of it is the nature of the business. The client has built out a business to sell this product. They may have paid to have prototypes and samples made. They may invest in space to hold inventory. In order to utilize the pictures, they will have a functioning website or an arrangement with listing sites. The pictures on the website are taking the place of a storefront in e-commerce, so the value an e-commerce photographer is bringing is significant, and should be paid as such.

Usage also plays a roll in photographer fees. Family portraits will only be seen by a few people, but thousands will be viewing product photography, perhaps hundreds of thousands. Those same images may be used in marketing, packaging, and advertising. All of these things will be discussed in advance and a contract will be signed with usage stipulations.

Photographers offer free estimates, but to give you a ball park, most e-commerce product photographers will charge $1500-$2500 per day with limited usage. Obviously this is a ballpark and prices can vary widely. In a market such as Los Angeles, that is a good reference point. The amount of products that can be shot in a day varies depending on the type of product and how many views are being shot, but an experience product photographer can get through a lot per day.

At Sonya Bowman Photography, I offer discounted rates for new small businesses and will offer an introductory $500 photo shoot for 3 hours. That allows the client to get started with professional pictures and see what it can do for sales.

If you are a business owner in Los Angeles and looking to expand your on-line sales, be sure to reach out to receive a quote catered to your specific needs.

You can see examples of e-commerce photography by clicking on the Product Verticals heading at https://www.sonyabowman.com/

Thanks for reading!

Headshots: Not Just For Actors Anymore

Once upon a time, headshots were primarily the faire of actors and models. Real estate agents have been using headshots in marketing for many years . C.E.O.’s and other board members would have had headshots for annual reports. Beyond that, most people didn’t need a headshot.

In the era of social media, however, headshots are for everyone. Whether it’s LinkedIn, a business blog, a company website, Instagram, Facebook, you name it - headshots are everywhere. People are networking mostly online these days, and giving colleagues and clients a face to identify with is important.

In this blog, we’ll start with headshots for actors – there are three different kinds!

After that we’ll get into business headshots, creative professional headshots, and social media headshots.

ACTORS

There are three different approaches for the headshots that actors use, each suits a different purpose. An actor may choose to include one, two, or all three types in their portfolio, so headshot photographers must know the differences and be able to provide the best images to help their clients succeed.

Theatrical Headshots are the most standard type of headshots for actors, and there are certain guidelines that casting agents will be expecting.

The background will be mostly neutral so as not to distract, and is usually a medium or darker color. Black may work, but lighting should be appropriate so as not to lose the actor’s hair into the background.

The crop is a vertical (portrait) composition that includes the top of the actor’s head and the shoulders. 8x10 is the traditional crop for prints. I provide clients with an 8 1/2 x 11, which is better suited to phones and can easily be printed 8x10 if needed.

The clothing the actor is wearing typically a lighter color with no pattern.

The expression is confident, but neutral. There are no big laughs in a theatrical headshot. Actors are expected to portray their core character with this single headshot. Is the actor going after roles for a tough cop? Their expression would be different from an actor going up for a soap opera casting. Soft smiles can portray a warmer disposition, and even a smirk might be appropriate for someone who is playing the more comical or animated roles. Actors may even have a variety of theatrical headshots to submit for various roles.

Commercial Headshots are intended for advertising clients, and as such can show more personality. Here the actor is depicting a salesperson, so they should look inviting and relatable.

The background doesn’t need to be completely neutral, but it should not detract from the actor. As long as the background is in soft focus, some visual interest in the environment might add to the overall appeal. For this reason, commercial headshots may be shot outside, although the photographer should still use studio or flash lighting, or at least be very proficient shooting daylight. It’s always important that the images look professional, because actors will be judged on the quality of their headshots.

The clothing may be brighter and with more distinction if the actor desires. Anything to help portray the character they wish to depict.

The expression must be inviting and relatable, as mentioned, but should also show personality. Commercial actors tend follow archetypes. Think of Flo, the Progressive woman. She likely had that hairstyle and makeup or something similar in her commercial headshot. They were looking for a type, and she was the type.

The crop is typically a vertical (portrait) composition that includes the top of the actor’s head and the shoulders or mid-torso. The photographer may also include some horizontal (landscape) images in a commercial headshot, if the client desires. This type of crop works well on websites and in other marketing materials. 8 1/2 x 11 works well on phones and can easily be cropped to 8x10 for prints.

Comedic headshots are for comedians and comedic actors. These should be more bold than the other types of headshots, but the actor/comedian and the photographer should beware not to go overly silly with comedic headshots. A little goes a long way, and the pictures should appear genuine, not forced, above all else.

The background in comedic headshots might be brighter and more dynamic than the other types of actor headshots. Think seamless paper with grid lighting, a white wall with hard shadows, or even something depicting a location or texture.

The clothing should be whatever the comedian normally performs in, or whatever is appropriate for the types of roles that the comedic actor is casting for.

The expression should be fun and engaging, but need not to be overly silly or performative. Booking agents and casting directors have a “less is more” approach with headshots, so a relaxed, genuine smile or an expressive smirk is going to be better than a clown face. (Unless they’re clown, then by all means do a clown face).

The crop can be vertical or horizontal on these, perhaps a combination of both to suit whatever needs the actor may have, but is still typically an 8 1/2 x 11 vertical.

Examples of Theatrical, Commercial, and Comedic Headshots

All images by Sonya Bowman Photography

Actors are not the only ones who need headshots, however. Next we’ll cover the three main approaches that headshot photographers should have in their arsenal.

BUSINESS HEADSHOTS

Business headshots are those that will most likely be used on LinkedIn, on business cards, on corporate websites, and in marketing presentations. The classic format of a business headshot is fairly standard, and should be followed by the photographer to provide the most professional results.

A studio background of medium blue or light grey is typical, however many clients prefer headshots in their office. In that case, the photographer may choose to use an environmental background, soft and out of focus, depicting an area in the office or outside nearby. At all costs, the photographer should avoid a pure white background, unless it is provided as a second option. The reason for this is that LinkedIn has a white background on the website, so any headshots on white will appear like a floating head, and not like the standard circular view.

The crop is vertical, usually provided in 8 1/2 x 11, and shows the top of the person’s head to approximately mid-chest. Some clients may wish to show more of a full torso view, so it’s important to communicate with you client, they can always crop closer when needed.

The clothing for business headshots is suits and ties for men, and businesswear for women. Business standards have changed significantly in post-Covid times, so this guidance should be taken with a grain of salt. Encourage your client to dress as if they had a big meeting or presentation that day. Corporate casual is fine for the office, but headshots should depict the best version of a person.

The grooming is clean and tidy for men, women usually do their own hair and makeup. The goal is to provide a professional and accurate portrayal that will match the person that shows up for a meeting or interview.

The expression should appear relaxed and pleasant. For some that will be smiles, for others it may be more neutral. Forcing a client into an expression that is not natural for them will come off looking phony, and should be avoided at all costs. Since these clients are often the least experienced in front of the camera, every effort should be made to put them at ease.

Photographers get the best pictures for their clients by providing them with clear posing guidance, reminders to keep their posture up, and suggestions for different head angles and expressions. Keeping some light, friendly conversation going between sets of pictures usually helps to put people at ease and elicits the most natural and flattering portraits.

CREATIVE PROFESSIONAL HEADSHOTS

Like business headshots, these images will appear on LinkedIn, in marketing presentations, and on small business and corporate websites . There is more freedom in the look and feel of the images, however.

The background can be whatever is appropriate for the client. Often times, creative professionals have interesting work spaces, so that may be a great location to shoot. A studio background of any color, a location such as an office, or an outdoor area will work, depending on the client, the business they are in, and that which they wish to portray. If the background is white, it should be lit for dimension, and not read true white to avoid the floating head syndrome on LinkedIn. Collaboration with creative professionals can lead to satisfying results, but the photographer should bear in mind that a headshot is still a headshot, so the background shouldn’t be too distracting. Discuss the options in advance with your client and choose the best approach together.

The crop is usually a vertical, but consider including other options. Horizontal shots can be very engaging on websites and other media. They also crop to squares very easily, which works well on LinkedIn and is handy for Instagram and other social media platforms.

The clothing for creative professional headshots is open for interpretation. In general, creative professionals tend to show more personality with their wardrobe, so by all means let that shine. All clothing for headshots should be neat, in good condition, and appropriate for the business they are in. Bringing 2-3 options for the clothing will allow the client and photographer to choose what works best.

The expression will be whatever the client feels comfortable with. A good photographer will always provide posing suggestions and feedback about posture and expressions, but not so much as to make the client nervous. A successful headshot photographer has a gregarious spirit that puts people at ease, and can read the needs of each individual to help them relax and take great pictures. Is it music? A snack? Some lighthearted conversation? Whatever it takes to get the picture. The photographer should be patient and attentive in getting the best out of each client.

SOCIAL MEDIA HEADSHOTS

Social media headshots trend more toward a portrait or fashion shoot, but I include them here as the dynamic is much the same as a headshot. Some clients may be looking for a variety of lifestyle images to use on different platforms or even dating websites.

When shooting for influencers, it is best to provide a variety of looks so as to generate as much content as possible. These clients are typically very used to photography and will work through many looks quickly. Photographers should consider using both their camera and cell phone to capture pictures and video to increase value.

Providing a variety of backgrounds is key to these shoots, so working on location is often a great solution. Having the client meet at the studio, shooting a few options there, and then going out into the surrounding areas is also a good choice. In this way, the photographer can easily provide the client with numerous looks without going through numerous set-ups, saving time and money for both the client and photographer. (Additional retouching fees may apply given the increase in image count, but influencers often do their own adjustments, so bill accordingly).

The crop may be square for posts, but stories are vertical, so follow the client’s requests on this, and above all, provide variety.

The clothing for influencers will be their own style, and probably plenty of it. Guide clients looking for general social media or dating profile content to bring at least 4 wardrobe changes to provide variety. The options should be mostly casual, possibly some business attire, but nothing too formal. Influencers are used to working quickly and making lots of wardrobe changes, but their hustle shouldn’t sacrifice the quality of the images. Photographers should help look for styling details, such as making sure a collar is laying flat, the buttons are done, and there are no obvious wrinkles.

The expressions should vary depending on what is appropriate for that particular setup. Not every image needs to have the client looking at the camera, but most should. Either way, the face should be relaxed and engaged. Just keep shooting and directing as needed so that at the end of the session, the client has a number of different looks that show different aspects of their personality.

Business, Creative Professional, and Social Media

All images by Sonya Bowman Photography

I hope you enjoyed this blog. At my studio in Culver City, California, I have the opportunity to work with a broad range of clients. Los Angeles is home to business professionals of all types. I work with each individual client to find out what their goals are with this image. Many of my clients choose to stay in Los Angeles or California, giving us the freedom to bend the rules of business headshots significantly. California is a more casual climate, in business and elsewhere. If a client is planning to seek work in New York, Boston, or Chicago, however, it’s important to stick with the more traditional expectations out of headshot photography.

Los Angeles is also home to many actors, models, and aspiring stars of all types. These clients may be more experienced when it comes to having their pictures made, and may even be under the direction of their agents. Actor’s agents in Los Angeles have specific photographers with whom they have contracted. Those photographers work closely with the agent to provide exactly what the agent is looking for. There is a visual language in all types of headshots, and while the photographer should always remain inspired and creative, they must also know when to stay in their lane, and deliver according to the brief. For photographers seeking to expand their business in headshots, the challenge is to come up with a style that is unique to the photographer, but still delivers on the standards of headshot photography.

If you would like to see more examples of headshot photography, please head over to this portfolio:

https://www.sonyabowman.com/headshots
Thanks for reading!

Path to Become a Fashion Photographer in Los Angeles

Have you always dreamed of pursuing your passion as a fashion photographer in Los Angeles? The fashion industry is notoriously difficult to break into, but with the premium day rates that fashion photographers earn in Los Angeles, your efforts can certainly pay off.

Occasionally I will be asked if I recommend fashion photography as a career. Typically I say, if you can imagine yourself doing anything else, it’s probably better to do that other thing. The reason is that fashion photography is an extremely difficult business, not only to break into, but also to maintain. The high cost of living in Los Angeles means that the ups and downs of freelance work in the fashion photography industry can be difficult to manoeuvrer. Only those with true dedication will survive.

For those of us who feel a calling at our core to photography, no other career will hold a flame. One must be committed, diligent, hard-working, creative, and capable with technology. They must be prepared to put in the time, and willing to do whatever it takes to bring the dream of fashion photography to life. If this sounds like you, please read the recommendations are below.

Menswear for fashion startup.

©Sonya Bowman Photography

What is a fashion photographer?

When you hear the term "fashion photographer," what comes to mind? Some may think of celebrity photographers like Mario Testino or David LaChapelle, while others may imagine someone taking glamour shots of models in high-end fashion shows. But what is a fashion photographer really responsible for?

A fashion photographer is responsible for capturing both the beauty and the fashion of clothing and accessories, as well as any special features that a client may wish to highlight. Fashion photographers work with designers, stylists, and fashion magazines to help produce images that reflect the latest trends and styles. In addition, they are often involved in developing photo shoots specifically for those publications. In order to become a successful fashion photographer in Los Angeles, you will need to have a passion for the industry and a great eye for composition. You will also need to be able to partner with other individuals on the team. There will be client representatives with their own obligations, such as making sure the right items are featured in the photo shoot and any functionality highlights are displayed. There will be an art director and/or creative director, who will have come up with the concept for the photo shoot. It is the fashion photographer’s job to see that everyone’s needs are met, without sacrificing the impact of the images that they create.

Last but by no means least, the photographer must have excellent people skills, so as to put the model at ease. Models are asked to wear all sorts of garments, and often asked to make exaggerated poses. They may be modeling swim suits in the winter time, warm coats in summer. The photographer creates the vibe on set that allows the model to relax and bring their best to the photo shoot.

Celebrity fashion photographers may have a reputation of being difficult to work with, but a newer photographer starting out in the fashion industry simply cannot afford to make enemies in this way. Photography is a business that relies heavily on personal recommendation, so a gregarious spirit can go a long way in ensuring the photographer will be called back again for future work. There are a few different routes you can take to becoming a successful fashion photographer in Los Angeles, so explore all of your options before making a decision.

Denim story for fashion blog.

©Sonya Bowman Photography

Why do you want to be a fashion photographer?

There are a few reasons people might want to become a fashion photographer. For some, it may be a passion or love of photography that drives them. For others, it may be a desire to create images that can be appreciated by others and help tell a story. Whatever the reason, becoming a fashion photographer in Los Angeles can be rewarding and very lucrative.

First and foremost, being a fashion photographer can be extremely fun. It’s an opportunity to capture beautiful images of people and fashion in all its glory, and to work with some of the most creative people in the industry. It can also be quite challenging, as there are many different styles and genres of fashion photography to master.

Another reason why becoming a fashion photographer in Los Angeles is worthwhile is the money involved. Depending on your experience level and portfolio, salaries can range from modest to very high. In addition, there are numerous opportunities for freelance work, which adds variety to your portfolio.

Menswear on location.

©Sonya Bowman Photography

What does the job of a fashion photographer entail?

-A fashion photographer captures images of people in clothing in such a way that helps potential customers look up to and identify with the brand.

-A fashion photographer will work with a team, typically consisting of a digital tech, one or more photo assistants, stylists, production assistants, makeup artists, and models, of course. There may also be location managers, prop makers, set designers, and the previously mentioned client representatives, creative and art directors. The actual designer of the garments may even be present. It’s a big team, and someone has to manage it all, so a photographer needs to have excellent leadership skills.

-A fashion photographer may work with magazines, advertising campaigns, online retailers, or social media personalities.

How to become a fashion photographer in Los Angeles?

Fashion photography is a popular and growing industry in Los Angeles. There are many ways to become a fashion photographer in Los Angeles, but the traditional route starts with a Bachelors program, or perhaps a technical school. When students are considering the school that they will attend, they should note the work placement opportunities offered by their school, as well as the individuals they will have the chance to network with along the way and even after they graduate.

Practice makes perfect, and it is necessary for a photographer to feel completely at ease with their camera. Even before starting school, an aspiring fashion photographer should be in the habit of photographing their friends and families in a variety of scenarios to learn the basics of photography first hand.

After graduating from school, it is best for a budding photographer to find work as a photo assistant. Here is where the networking from school days can come in handy. It only takes one person to hire you and show you the ropes to help launch your career in fashion photography. A student is taught the fundamentals of photography, and is introduced in a variety of styles and techniques. Working on set as an assistant teaches the newbie photographer everything else they need to know, from set etiquette to proper handling of studio gear. If the assistant is lucky enough to work with a fashion photographer who is successful in their career, they should work with that photographer for as long as it takes to learn everything they can from the master. This may be anywhere from one to three years.

New photographers should not rush into their career and skip the step of assisting. This phase of one’s career supplies the all-important networking opportunities that every new fashion photographer will need to get their career going. Most assistants work a number of fashion photographers to learn as much as they can from a range of people, each with their own styles and skill sets.

Assistants will sometimes be approached by potential clients who are working on a strict budget, which is an excellent foot in the door. They will also meet models and other crew members who may also be new in their career, and therefore willing to pose for test shoots.

Test shoots are unpaid photo shoots with the goal of producing portfolio-worthy images that can be utilized by the photographer, model, stylist, makeup artist, and even the retoucher. Scheduling numerous test shoots in a variety of locations hones the young fashion photographer’s skills and gives them the opportunity to lead up teams and demonstrate an ability to move from a creative brief, through the pre-production process, the shoot itself, and post-production. (See definitions at the end). All of these skills are vital when the photographer is booked by a paying client, and it is best to polish the skills before a budget is on the line.

Even after a fashion photographer has broken into the business, they can continue their learning through workshops and creative retreats. If you are passionate about fashion photography, there are many opportunities available to you in Los Angeles, but you have to be patient and willing to put in the work.

E-commerce fashion photography is typically shot on a more neutral background.

©Sonya Bowman Photography

Tips for a successful career as a fashion photographer in LA.

1. Stay up-to-date on technology. Photographers use a variety of cameras and lighting, as well as software. High end fashion photo shoots will always be on the cutting edge, so the photographer looking to get there will spend time reading product reviews, going to camera stores to see new gear, and attending seminars to learn some new tricks.

2. Keep inspired. Stay on top of trends by continually watching the fashion industry and observing what other fashion photographers are doing. Inspiration need not come in the form of photographs alone, however. Many photographers take inspiration from other forms of art or even by visiting other cultures. You cannot give from a well that is dry, so continue to inspire yourself in whatever way works for you. A visit to a museum is a great way to get the gears moving.

3. Join professional photo associations. These are a great way to network with other photographers and learn from their experiences. The American Society of Media Photographers (ASMP) is a good resource that offers a variety of services to their members, from contract templates to advice on insurance and a multitude of local networking opportunities. Other options are American Photographic Artists (APA) and the Professional Photographers Association (PPA). Depending on which organizations you join, you may also be featured in their catalog that gets sent to advertising agencies and editorial fashion photography art buyers, which may lead to your next job.

4. Be open to different opportunities. Every fashion photographer dreams of having a spread in Vogue, but we all have to start somewhere. If you are still building your portfolio and contacts list, you may choose to take a full time position or on-going freelance in an e-commerce roll. These types of fashion photography jobs may not be as glamorous as their editorial counterparts, but they offer security and time while the photographer continues to hone their skills, both behind the camera and as a team leader.

5. Never stop building your portfolio. You may be working on some jobs that result in images that are striking enough to make it to your portfolio, but often times paid work can be less than what we aspire to. For that reason, keep testing. Keep working with new talent and with new techniques. A fashion photographer's portfolio should be ever changing and always demonstrating the very best of the photographer’s work.

If you are wondering how to make a portfolio, please checkout Sonya Bowman Photography.

Definitions:

Creative Brief – Photo shoots begin with an idea. This idea needs to be communicated to all members of the team so that everyone knows what the end goal is. This can be as simple as a Pinterest board, but it can be presented in a variety of ways – a PDF, a slide presentation. There may even be sample books to display textures and fabrics. Without an art director to guide the shoot, this task will fall to the photographer, stylist, or combination of the two working together.

Pre-production – There is a lot of work that goes into making the photo shoot a success. Pre-production entails anything that must be done to get ready for the shoot. It could be location scouting, model casting, purchasing paints, furniture, or other set decorating items, renting gear. The stylist will be gathering the clothing and accessories to be used on the shoot. A call sheet is sent to the talent and crew telling them where to be and when, where they should park or how to get there, whether or not lunch will be provided, and contact info for everyone on the crew. In short, making sure everyone has everything they need on the day of the shoot to bring that creative brief to life.

Photo Shoot – This is the day everyone has been gearing up for. A fashion photo shoot typically has an early call time. The makeup artist arrives and sets up their station. The model arrives as dictated, typically with clean but moisturized skin, and hair as directed depending on the circumstances. The photo assistants and photographer arrive and get the lighting set up. This may have been roughed in during the pre-production, but it will now be finalized and ready to go by the time the model is camera ready.

Post-production – After the photo shoot, there may be gear to be returned, the stylist will usually return some of the things they purchased for the shoot. If invoicing information was not included in the call sheet, the crew will be sent an email instructing them on how to submit their documents for payment. Most importantly, the images will be selected, retouched, and delivered to the client (if there is one) or the crew (if they worked with the promise of portfolio images).

Creative Still Life and Product Photography in Los Angeles

Creative still life photography refers to the arrangement and photography of objects that have been placed in a visually pleasing composition. For commercial photographers, this type of work is called product photography, as it is done to sell products. The photographer may choose to work alone, but more often partners with a stylist, who creates these compositions through careful arrangement and selection of props. The stylist is responsible for preparing the products for photography and displaying them in the best way to show off their features. This allows the photographer to focus on the technical aspects of product photography, such as camera settings, lens selection, software adjustments, and most importantly, lighting.

Creative still life photography often uses unusual angles and lighting to compose the images so that they have maximum visual impact. Commercial photographers may choose to specialize in product photography, while others may offer it in addition to other services, such as fashion photography.

In this blog, we will cover creative still life photography intended for advertising, social media, or splash pages and banners for websites, as well as product photography for e-commerce.

The History of Still Life Photography

Still life paintings are the genesis of still life photography. Photographers typically have an art degree, and their early university education includes a variety of 2-D and 3-D design classes, as well as life drawing (human form) and sculpture. This multi-media approach is designed to develop the artistic eye of the budding photographer. All art relies on the same fundamentals – color theory, composition, perspective, form, and technique. Learning the visual language is step one in mastering photography.

In the early 1800s, still life photography was used as a means of teaching anatomy to medical students. Still life photography was also utilized to teach perspective to art students. Perspective, when describing art, means the way that the artist depicts how things actually are in space, through the use of geometry, scale, and atmosphere. A photograph creates a two dimensional depiction of a three dimensional world, so many painters start with a still life photograph as a reference.

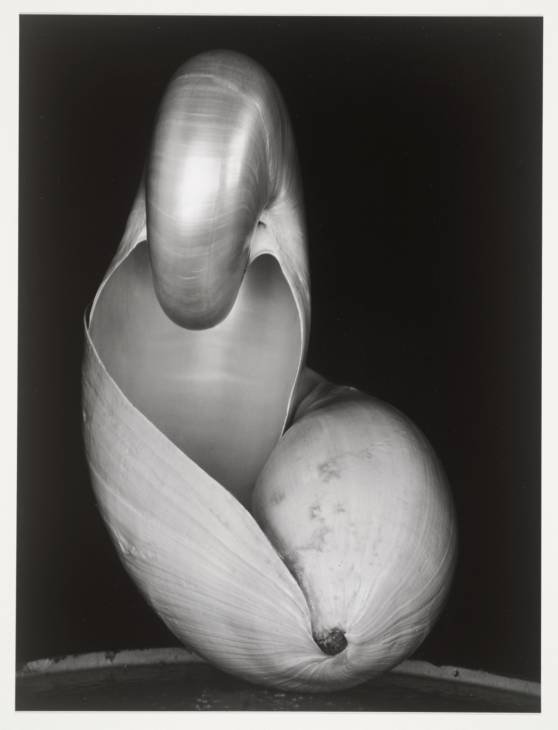
In the late 1800s and early 1900s, still life photography began to be used as an art form in its own right. One of the most famous early practitioners of this style was Edward Weston. He is best known perhaps for his landscapes, but as a pioneer of still life photography, he photographed flowers and other plants, as well as fruit, glassware, shells, and other objects.

Edward Weston, “Shell” 1927

Although this blog focuses on commercial photography, all photographers benefit by studying the work of their predecessors, and practicing the craft as an artistic pursuit. Freed from the confines of commercial photography, the photographer can develop their personal style, explore various techniques and lighting setups, and fuel their own creativity and passion.

Techniques for Creative Still Life and Product Photography

Now that we have explored the history, let’s talk about the different kinds of still life photography that are typical in today’s commercial photography world. We will also delve into the tools and techniques that product photographers use to create their still life photographs.

1. The setup

Still life photography can mean a variety of things. While it typically refers to objects shot on a tabletop, it can also include room scenes and environmental setups. Room scenes are used to display furniture and home decor.

Environmental setups refer to any object placed in an area that depicts a genuine place. Environmental photography may be shot in a real location, or they can be built in a studio to mimic a room, outdoor area, kitchen or bathroom counter, and so-on. Setting up in the studio allows the photographer full control over the lighting and other technical aspects.

Boho Room Scene, studio setup depicting artificial window light and heavy propping.

©Sonya Bowman Photography

Environmental photography shot in a real life location is sometimes preferred for social media usage as it tends to feel more natural. Often, when product photography is shot on location, the photographer will rely on natural light coming in through a window. Occasionally, available light, such as that provided by existing lamps and other light fixtures will be used by starting photographers.

It should be noted that the colors expressed by those lights will be visible in the photograph, even if our eyes cannot perceive the differences. For instance, if you are in a home or apartment, and there is florescent light coming in from the kitchen, it will cast green light. The lamp beside the sofa, however, will cast orange light. Professional photographers avoid using available light in all circumstances aside from architectural photography.

Window light, however, is one of the most beautiful types of lighting, providing a soft, directional, color neutral lighting that feels inviting.

Boho room scene shot on location with natural window light. ©Sonya Bowman Photography

While creative still life photography can mean a variety of things, product photography is usually referring to objects shot on a tabletop. Some photographers have a a selection of surfaces to use, such as antique tables, distressed pieces of wood, various marble slabs, and so on. The best studios will have a variety of surfaces to choose from to lend atmosphere and depict a mood.

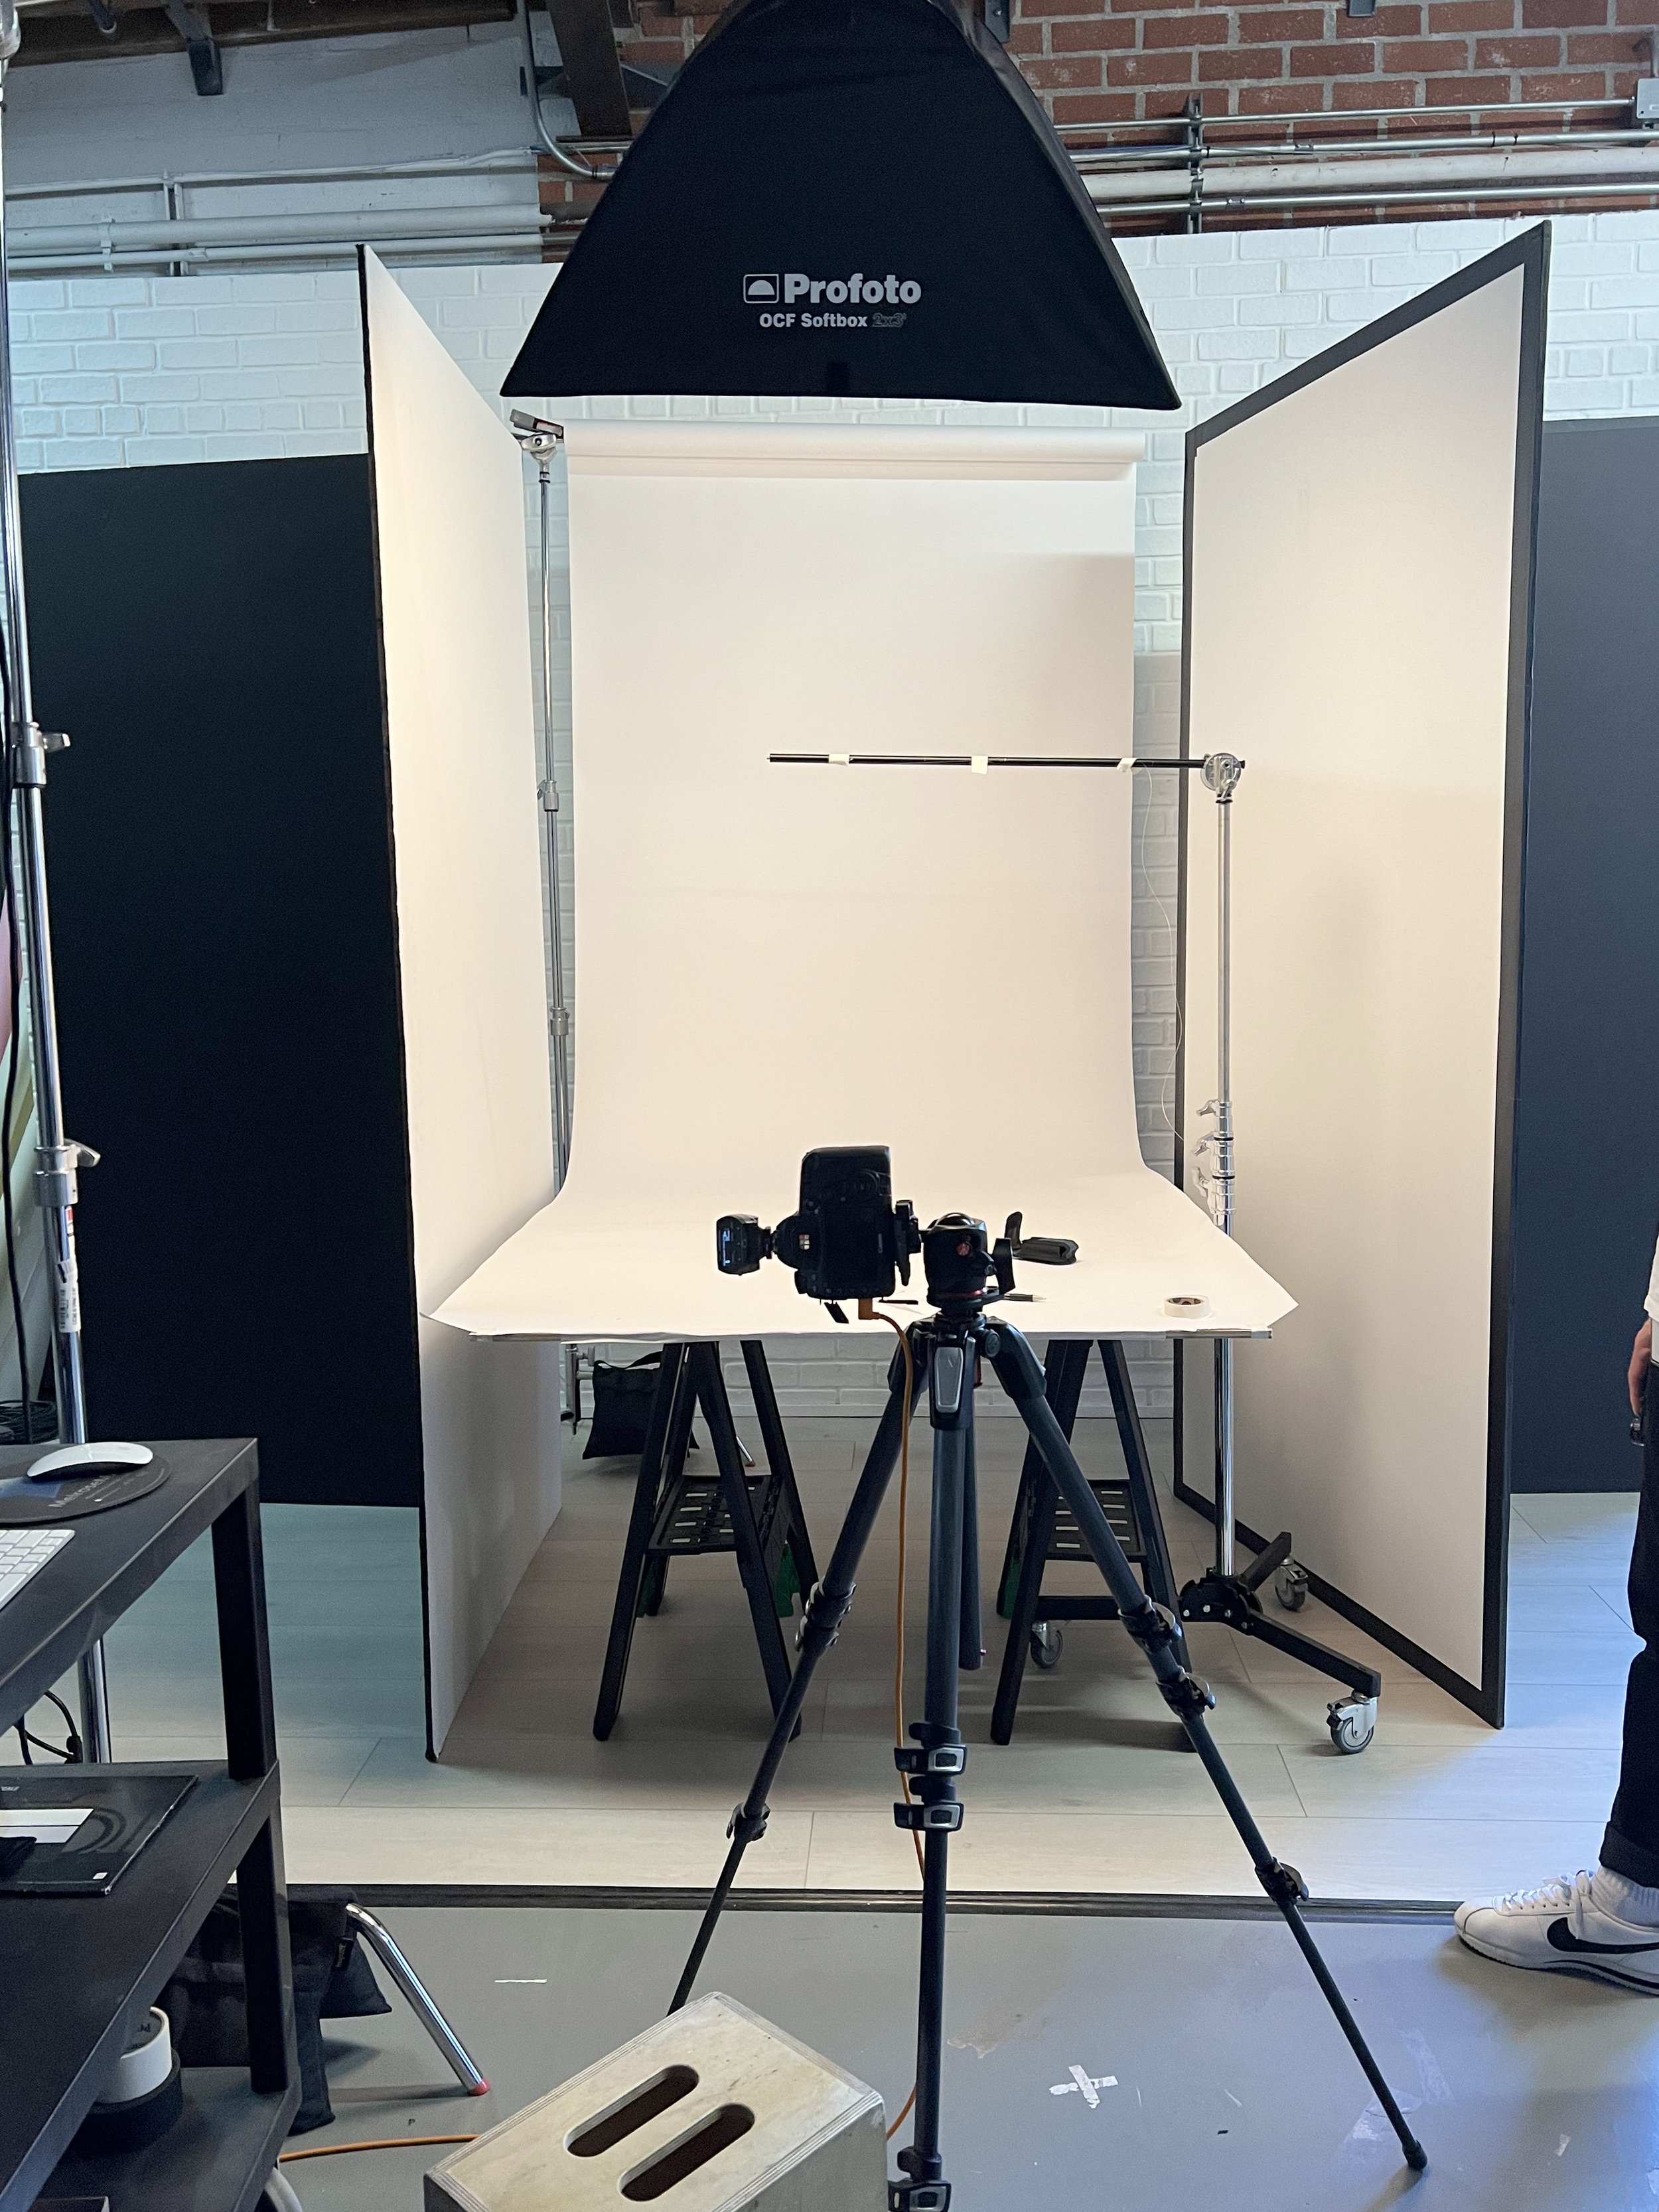
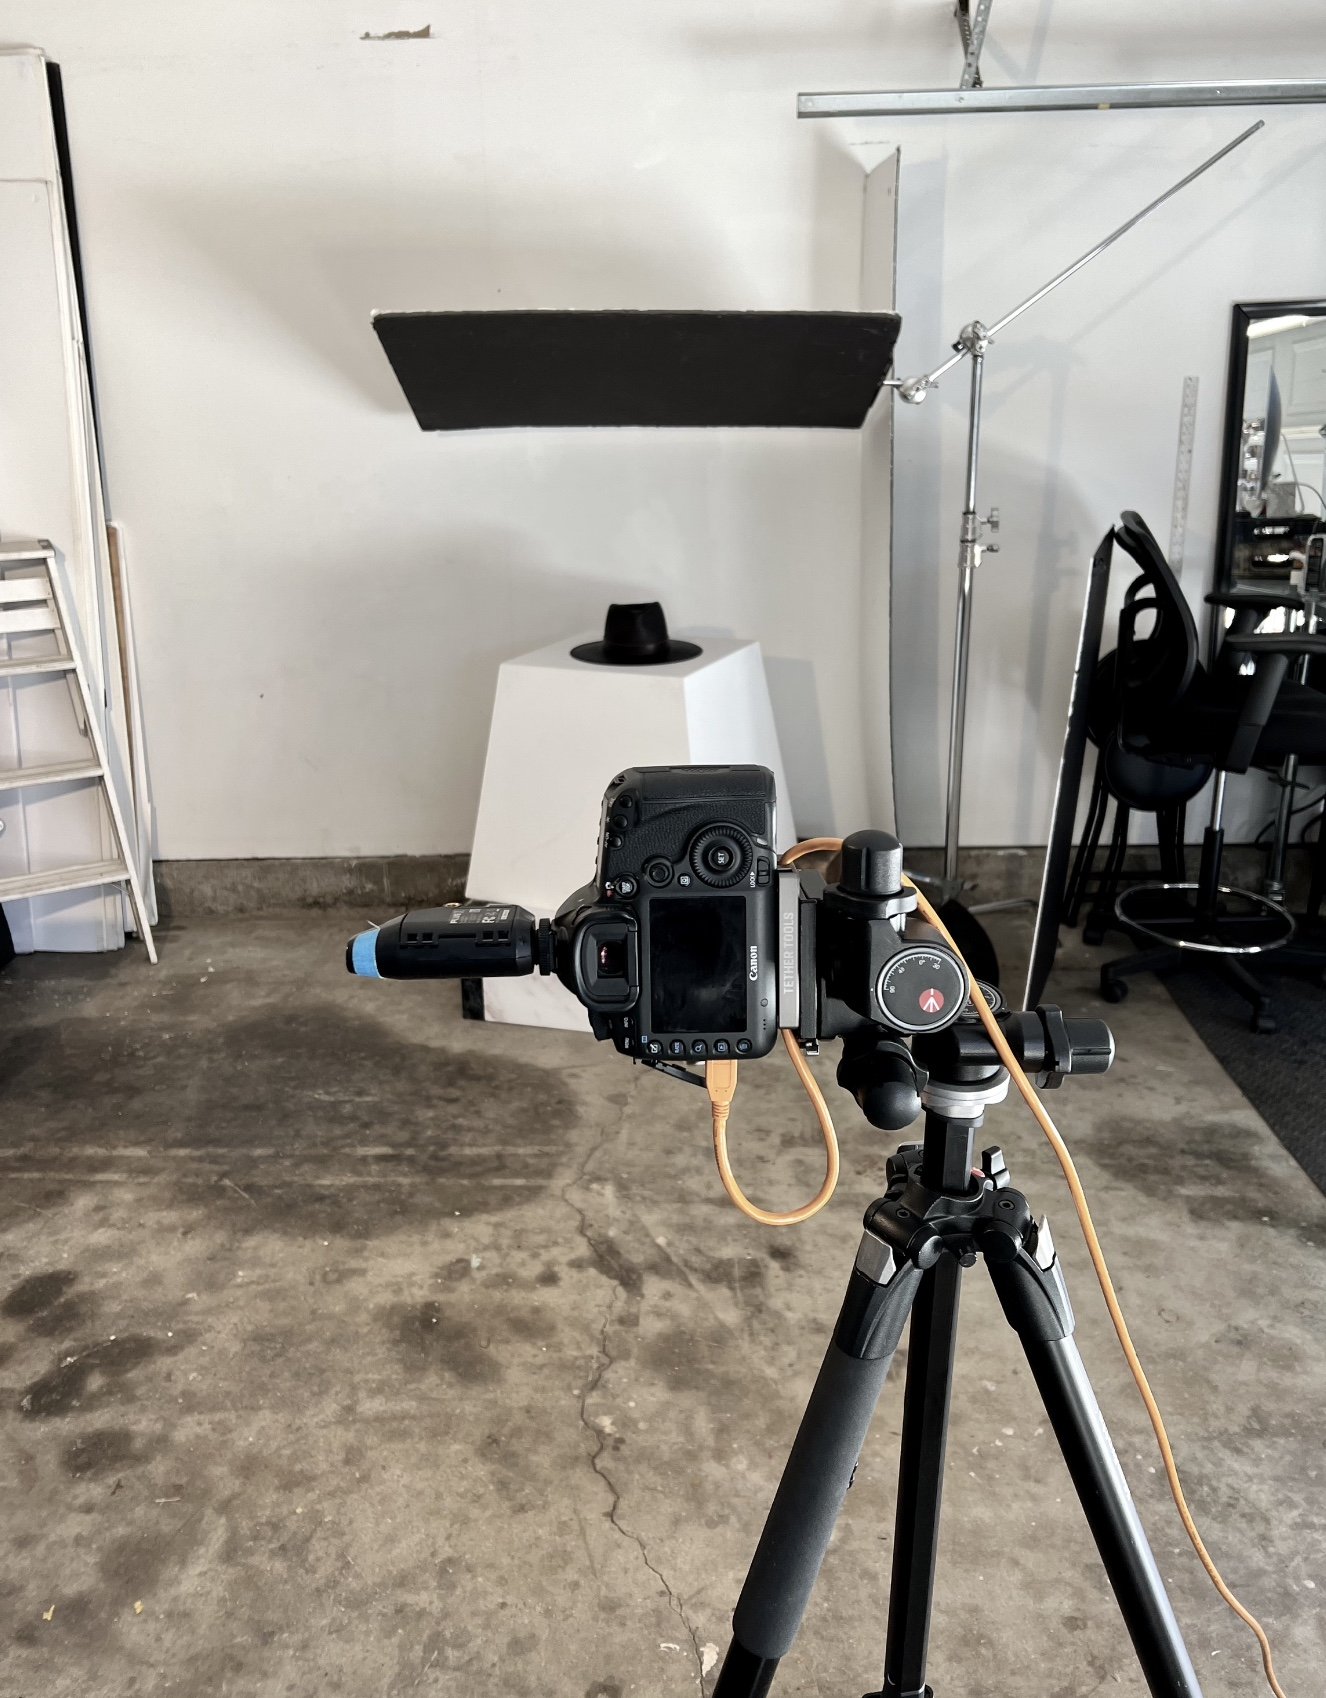
The standard basic, however, is a simple 4x4 foot piece of 1/2 inch plywood supported by a pair of sawhorses. These items can be purchased at your local hardware store for under $100 dollars. The plywood is not the surface the photographer shoots on, but is instead used in combination with a c-stand and a 53 inch x 18 foot roll of seamless paper. A sweep, or soft curve, is created with the paper along the back edge, which allows for the endless horizon look that is standard in e-commerce photography.

Standard product photography studio setup.

©Sonya Bowman Photography

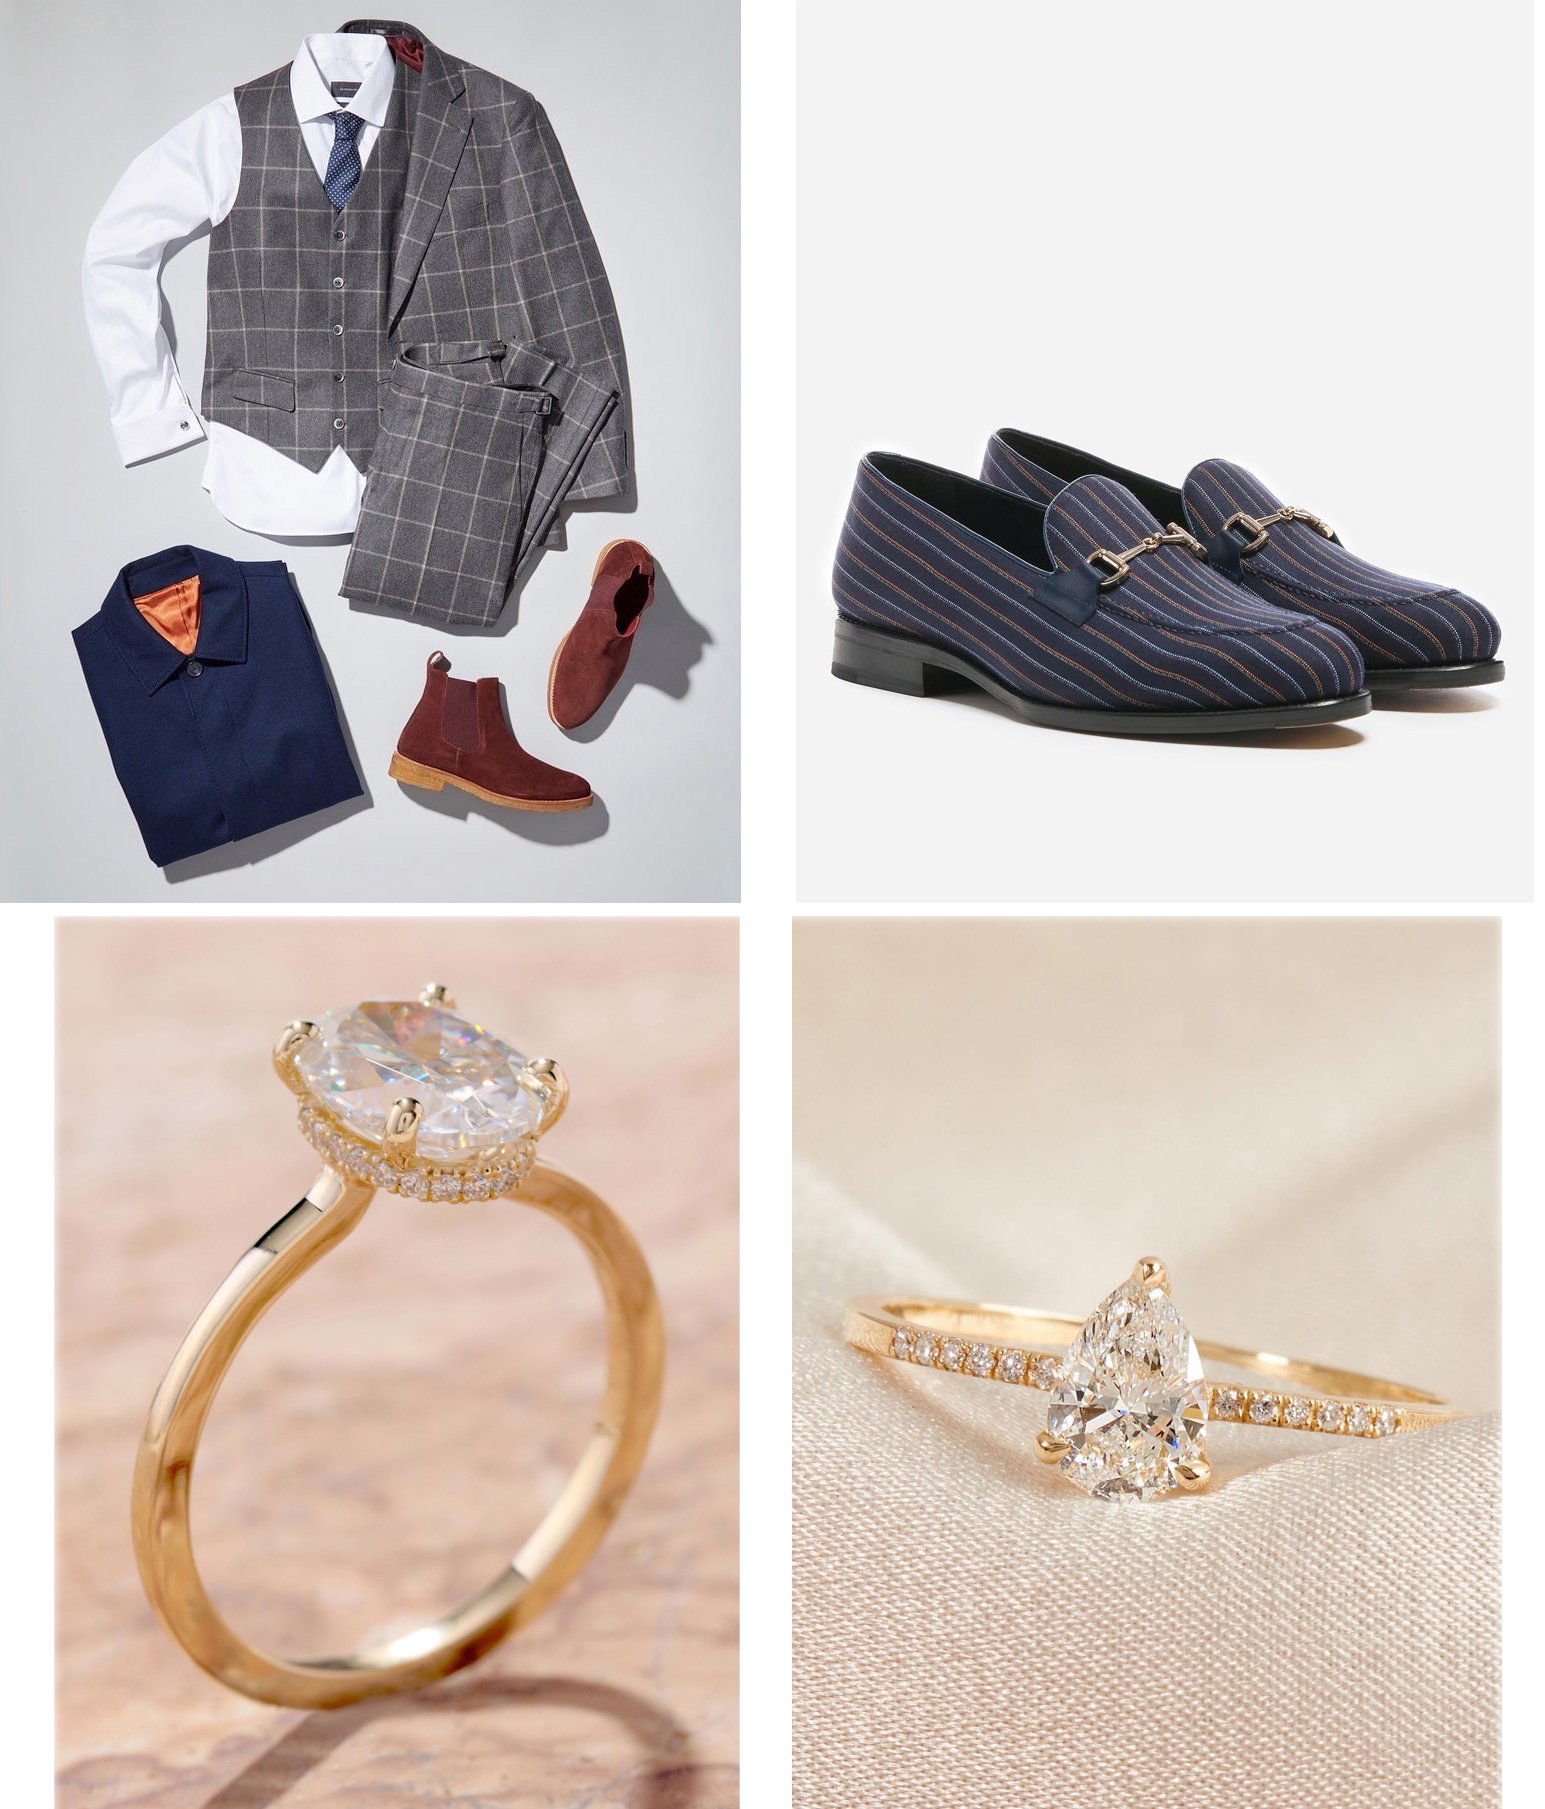
For jewelry photography, photographers may use that basic plywood setup to place marble slabs, fabric cuttings, art papers, or a combination thereof. Not having a paper sweep in the back allows the photographer to place a light behind the jewelry, which allows for the more directional type of lighting that is sought after in today’s creative still life photography aesthetic.

Examples of surfaces used on top of the standard product photography studio setup with directional lighting.

©Sonya Bowman Photography

2. The lighting

For a long time, softboxes were the standard in still life photography, and remain the standard for e-commerce photography. E-commerce product photographers light in such a way that the background can be removed altogether. “Clipping” is a technique used by retouchers to remove the item from its native environment, and place it on a clean white (or other) background. Using softboxes provides a neutral, shadowless lighting style that looks harmonious on the artificially created background.

In creative still life photography, however, directional lighting is typically the preferred approach. Directional lighting, as its name implies, gives the viewer an idea of where the light is coming from. If the shadow lands in front of the object, the light is behind the object. If the shadow is off to the side, the light is on the other side. Directional lighting feels most like sunlight, and allows for the textures and details of a product to really shine, as opposed to the softbox technique that tends to diminish details. (Not always a bad thing, many products look best when lit with a softbox).

Examples of directional and soft lighting.

All images © Sonya Bowman Photography

To achieve a hard shadow, the photographer uses a light with a bare bulb (no light modifier) or a reflector (the standard silver bowl attachment that comes with most studio lights). Often a hard light is used in combination with fill cards or a second light outfitted with a softbox to fill in the shadows and decrease the drama that is an integral part of directional lighting. Product photographers must balance the visual appeal of a composition while displaying the product in such a way that the customer can understand the features and details of said product.

Creative still life photographers may light their products is by creating a natural window light effect in studio. To get this type of lighting, a white wall or bank of V-flats are used to bounce light against. The lighting remains directional, yet it is softer than the bare bulb technique, and is a flattering approach on a variety of items.

(Note: a V-flat is a pair of 4x8 foot white cards, usually foam core or gator board, taped together on the long edge to create an area of 8x8 feet. V-flats stand on their own due to the V shape, eliminating the need for additional C-stands. See example in standard product photography studio setup, above.

Examples of simulated window light in studio (home goods) and natural window light (kid’s clothes)

All images © Sonya Bowman Photography

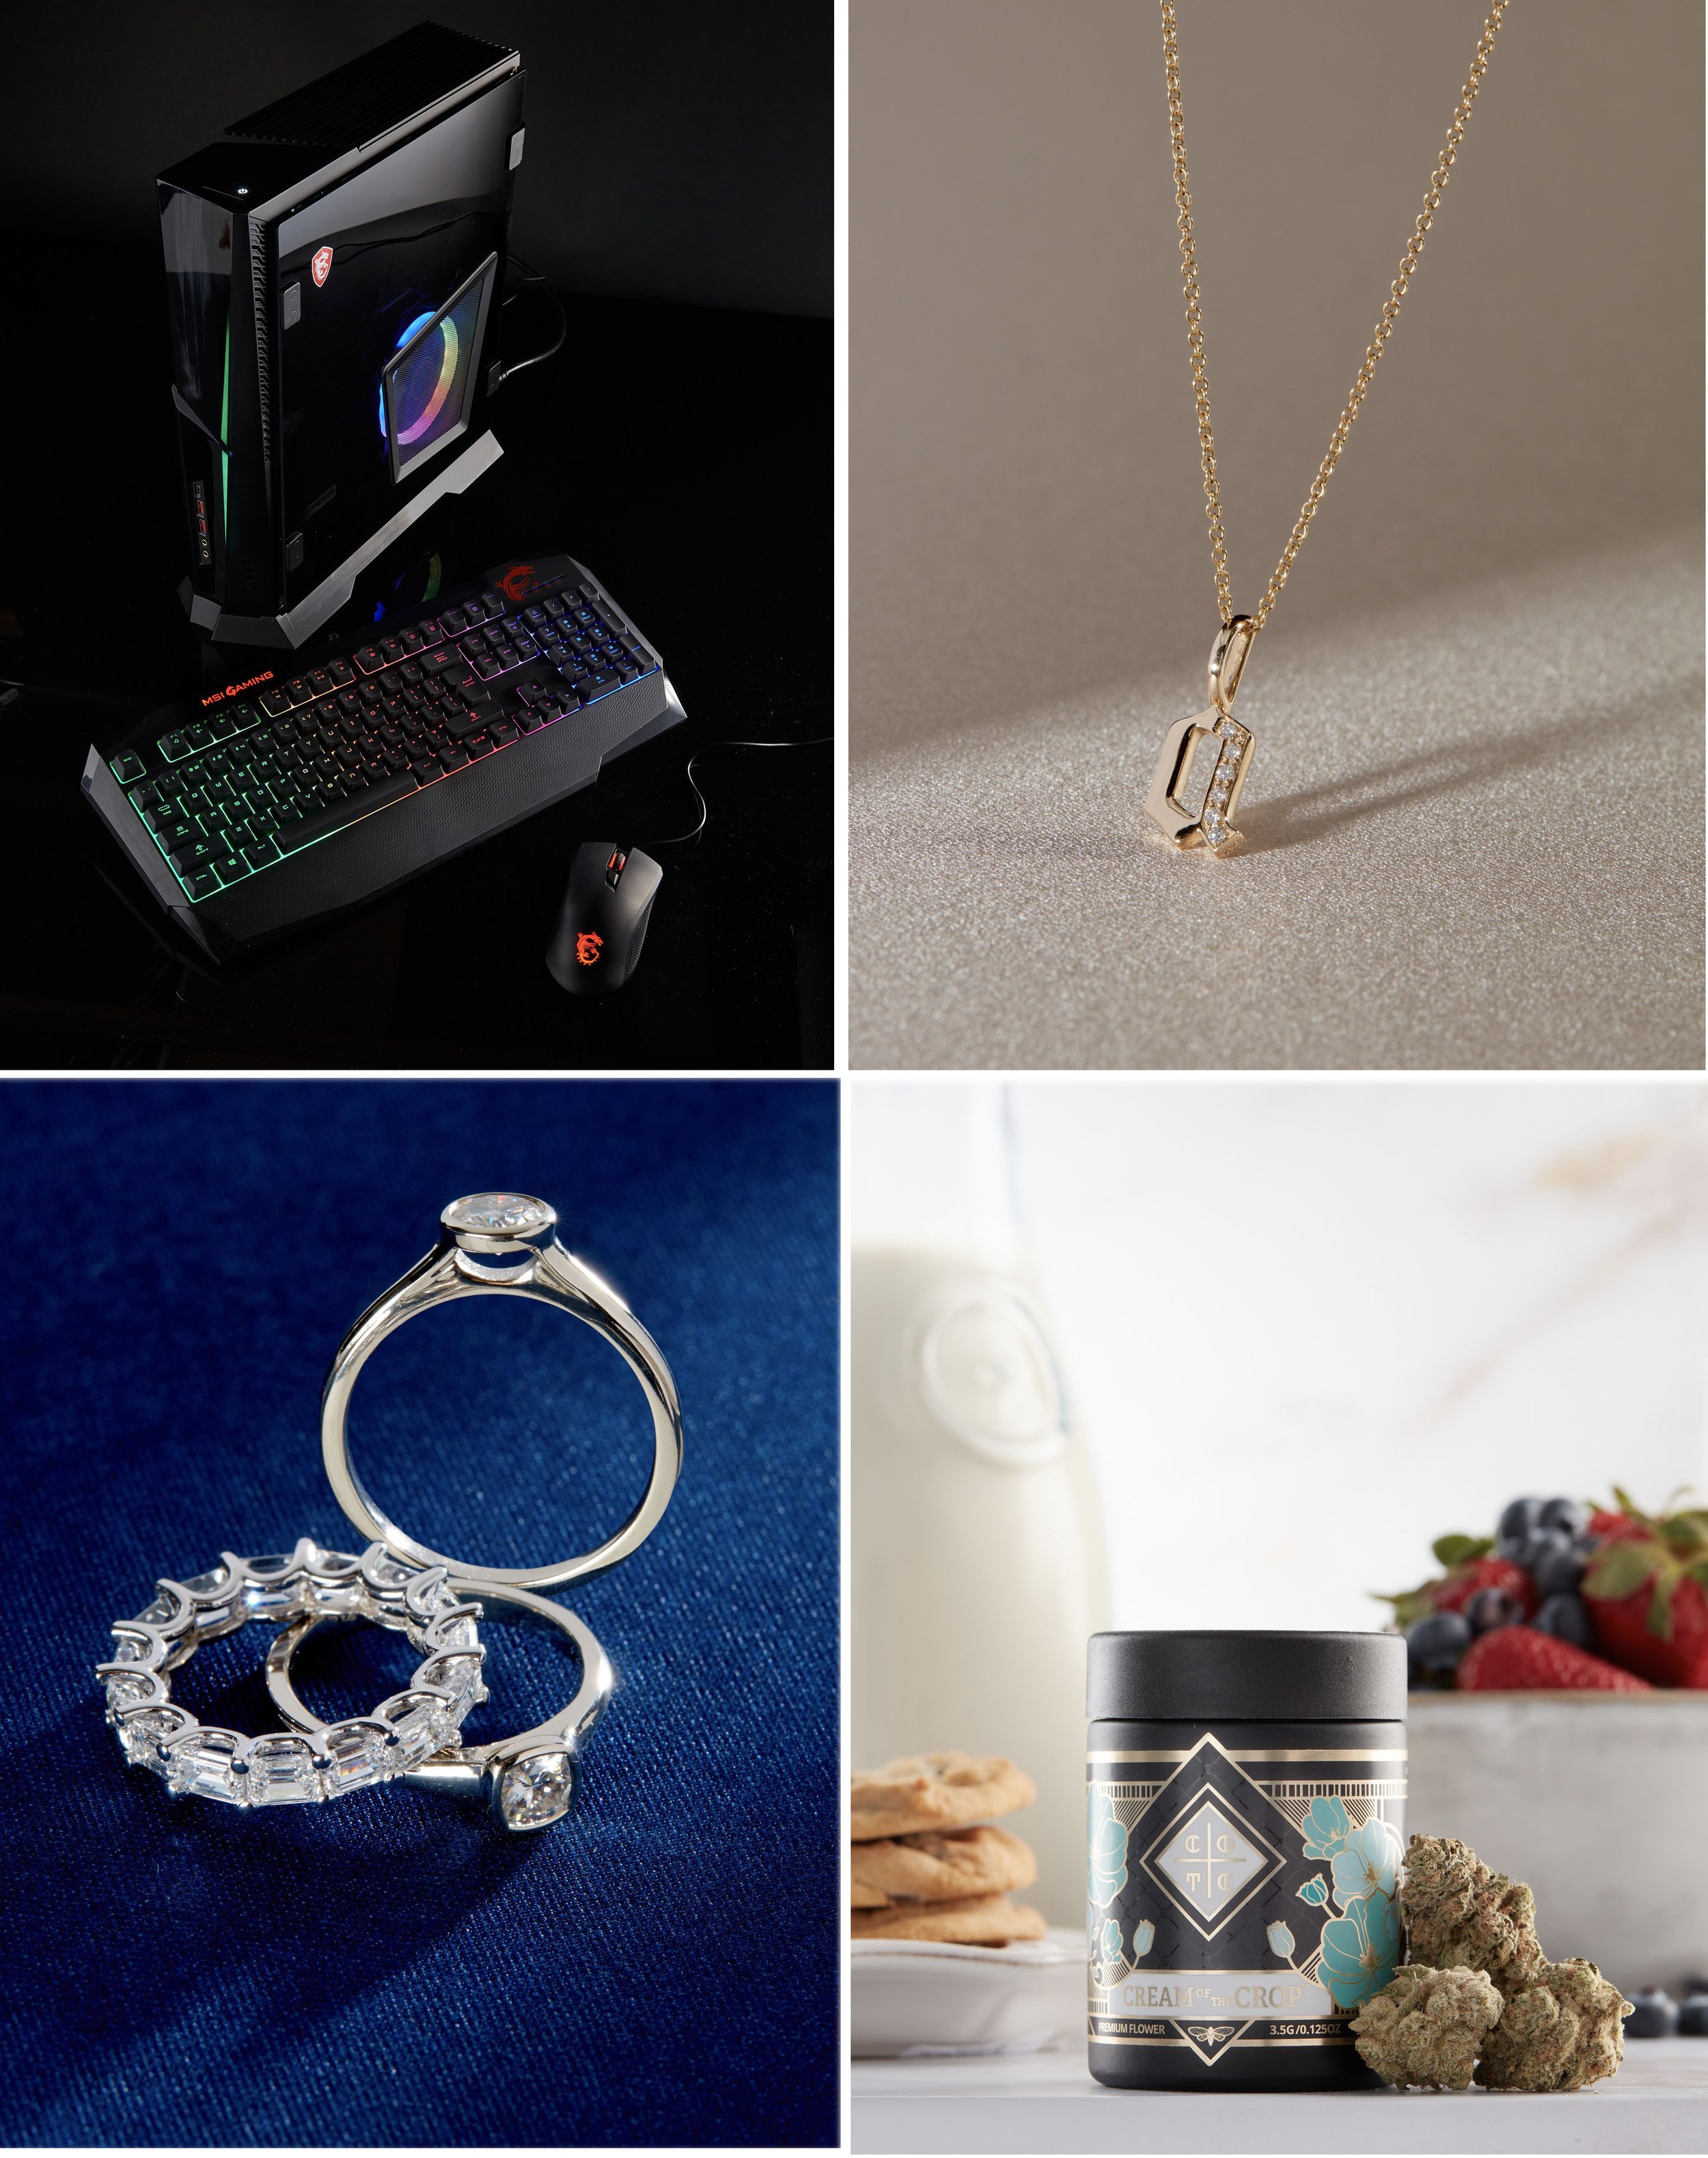
Finally we have the technical lighting approach. This look relies on the light heads being outfitted with either grids, spotlights, or strip softboxes to highlight a single edge of the item or area in the composition. This type of lighting is, unsurprisingly, often used when photographing tech items, such as computers, phones, and so on, but may also be used by advertising and jewelry photographers. Sometimes gels are applied to the lights to create dimension and color. Since this type of lighting is master level, we will address it in a separate blog at a later date.

Examples of technical lighting.

All images © Sonya Bowman Photography

3. The lens

As noted earlier, product photography can include a great variety of objects from something as small as a piece of jewelry up to a sofa or table and chairs. For those larger items, the go-to lens is a Canon 24-105mm zoom lens, or something equivalent. 24mm is a wide setting, and may result in distortion of the room or objects at the edges, so it is best to keep the lens at a 50mm or above when possible.

For jewelry photography and other small items, as well as close-up details such as fabric swatches, the best lens to use is a 100mm macro lens. This lens allows the photographer to get very close to the object. The macro setting simply means the lens is capable of focusing up-close. The longer the lens, the more pieces of glass are involved. Those additional layers mean more light is required, so a jewelry photographer will absolutely need good studio lights to create the detail and depth of field that is needed to photograph jewelry and other small items effectively.

(See jewelry examples above)

4. The props

For e-commerce photography, the photographer will seldom use props. Sometimes it is necessary, such as when you are trying to illustrate the purpose of a product. A money clip may be propped with some crisp bills. A phone case may get propped with a phone. A vase may be propped with flowers. In general, these propped shots are the alternate views, because when it comes to product photography, the goal is to display for the customer the item that they will receive once they make a purchase. The description may clearly point out that this is a phone case. However, if the only pictures provided are propped with a phone, there will inevitably be some customers who will expect it to come with the phone. A product photographer’s job is to describe with pictures everything there is to know about a product and what the customer can expect to receive.

Note how the addition of the phone as a prop illustrates scale and demonstrates function.

©Sonya Bowman Photography

For creative still life photography, however, the props are an integral part of creating the environment that evokes a lifestyle that the brand wishes to project. For packaging and advertisements, the photographer will depict an environment and propping that illustrates the place and way the product will be used. Kitchen items will show food, a picture frame will have a photograph .

For jewelry photography, a stylist may opt to place some crystals in the background, soft and out of focus, to create an elevated and feminine look. For cosmetics and skin care, flowers might be the best prop. When shooting kitchenware and other household items, the stylist may opt for fruit and vegetables, bottles of wine, linens, baskets, glassware, porcelain, and pottery. The props must be carefully chosen and placed in such a way as to enhance the photograph without detracting from product itself.

Examples of propping

All images © Sonya Bowman Photography

Los Angeles Product Photographers

Los Angeles is home to many product and creative still life photographers. In a large city like Los Angeles, photographers have easy access to all of the things that they need to capture beautiful, eye-catching still life photographs.

Los Angeles is home to Samy’s Camera, which is where many photographers source everything from cameras and lenses, lights and modifiers, seamless paper and gaffer’s tape. Samy’s Camera has many locations around Los Angeles, and photographers can rely on them to have all of the photography essentials.

For props, Los Angeles has everything a product photographer could need. There are marble slab companies that photographers can purchase to use as backgrounds. Mood Fabrics has a location in Los Angeles, and photographers can source an endless variety of fabrics and textiles to be used as backgrounds in creative still life photography. Mood also has ribbons and other notions that stylists might use as props in the photograph.

The flower district in downtown Los Angeles has cut flowers in every variety and color that can be used as props in product photography. There are even large household plants that can be used in room scene photography, as well as vases, ceramics, and pottery that are helpful when creating environmental photography.

Los Angeles is a well known fashion hub. When creating room scene and environmental photography, there may be a need for shoes by the door or a jacket on a wall hook to help the set look more natural and believable. Whatever the prop, Los Angeles has everything a photographer could need to help their photography look the best.

Note how the addition of props displays use of products and brings to life an otherwise dull environment.

©SonyaBowmanPhotography

For photographers on a budget, EcoSet in on the east side of Los Angeles is a treasure trove. EcoSet provides services to larger productions that want to reduce their environmental impact by sending fewer things to the landfill. What EcoSet does is to provide dumpster services, separating the trash from the reusable items. They house those items in a giant warehouse and make them available free of charge to photographers and filmmakers who are working on a budget. EcoSet has a lot of set pieces from television productions and commercials. They also have flooring, home furnishings and other props, although their stock is always changing depending on what is available. Photographers never know what they will find when they visit EcoSet.

The most important asset for photographers in Los Angeles, however, is the people. Photographers do not work alone, they collaborate with art directors, stylists, production assistants, and retouchers to create the creative still life photography that they are hired to do. Los Angeles is home to a giant pool of talented, professional, and creative individuals who work together as a team to produce the best still life photography available.

I hope you’ve enjoyed this blog about creative still life and product photography. If you would like to see more examples of still life and product photography, please visit my website Sonya Bowman Photography.

The Trends in Fashion Photography

The Trends In Fashion Photography: From Styled To Shot

Why hire a professional fashion photographer? You may be working with social media influencers to capture your fashion photography as you get your business off the ground. Influencers have a personal style and built-in audience than make this an integral part of many up-and-coming fashion brands. Eventually, however, if you want to break into new markets and expand your sales, you will need to hire a professional fashion photographer.

Commercial photographers have the expertise to capture the images you need to really get your product moving. From the basic e-commerce, or catalog views to the more eye-catching styled editorial shots, fashion photography is a tried and true method to drive sales. A professional fashion photographer will offer a wide range of services to find the perfect solution for each individual brand’s needs. So if you're looking for the best fashion photography services, you need to understand what options are available to you. In this article, we will talk about the trends in fashion photography, as well as the pros and cons of each type of fashion and apparel photography.

What is Fashion Photography?

Fashion photography evokes visions of highly stylized, beautiful images with gorgeous models. These pictures define a brand’s aesthetic and inspire customers to align with the feelings evoked by the photos. This type of fashion photography can be used for advertising, editorial content in magazines, social media, and on the company’s website as banners or splash pages. Fashion photography of this type takes time to produce, and is a true collaborative effort. Shot with a variety of different camera settings and lighting techniques, fashion photography can be very difficult to pull off successfully because the images need to look effortless and unexpected to be truly successful, yet the process is quite involved.

It begins with the casting. The producer works with the brand to identify what sort of model the brand would like to represent their brand. These specifications are communicated to model agents, who send their talent’s e-portfolios for a first pass review. From those portfolios, a short list is compiled of talent that suits the client’s specifications, and those models are invited in for a casting.

Casting is an integral part of the process because it allows the photographer to ascertain what sort of energy this model will bring to set. All models have good angles and can look gorgeous in a photoshoot, but not every model is right for every job. Each photo shoot will have its own set of parameters that help to define which model will be a great fit. It is a good idea to have the models try on 2-3 looks to make sure the fit samples are working with as few alterations as possible. This also allows the photographer to see how quickly the model changes into the next outfit, how they handle themselves on set, and how comfortable they are with posing. For a high end fashion shoots the models need to be very creative and have a wide variety of poses that work well for the camera. For e-commerce fashion shoots, it’s more important that the model changes quickly and photographs well from every angle.

How is Fashion Photography Different from Commercial Photography?

Commercial photography is any type of photography that is to be used to sell something. It is the commerce in an e-commerce shoot, it is the catalog pictures that help a customer decide whether to purchase a product. This type of photography is typically shot in a studio setting with a predetermined plan and style. Each website will have it’s own look for the virtual storefront that is a website. All white everything is the defining look of many websites, but it is not always the case. The current trend is a light color background, typically variations of grey. Some brands may incorporate a sparsely designed set or simple props, but nothing should draw the eye away from the garments themselves.

Fashion photography for advertisements and media are highly styled. In fact, it may be difficult to see the details of the garment. Only the mood really matters in this type of editorial fashion photography. The idea is to inspire buyers to align themselves with the lifestyle that is depicted in the images. Often, the model and location are featured more than the clothes.

For commercial fashion photography, however, the product must be shown in such a way that the customer will understand the fit, color, and features of the garment. For that reason, standards are designated in advance of the shoot to make sure that each item is accurately and clearly represented and that the website has consistency from item to item as the customer scrolls through. These parameters being identified and defined in advance of the shoot allows for maximum efficiency, as everyone knows what the end product should look like.

Planning a fashion photography shoot

The first step in planning a photo shoot is to determine how many garments will need to be shot, and the best ways to capture those items to maximize brand recognition and time on set. It is typical to plan a portion of the shoot for e-commerce imagery and a portion of the shoot for editorial fashion photography. It may be that the e-commerce is shot in studio and the editorials on location, or the editorials may also be in studio but with more dramatic lighting than the e-commerce images.

The editorial photographs produced in the shoot will be utilized by the client for advertising, social media, and banners and splash pages on the website. The model chosen for an editorial day might differ from the model chosen to shoot the e-commerce. If a clothing brand has one day of photography is in the budget, we typically reserve a portion of the day to do some more creative looks.

Booking the crew

So far we’ve talked about casting for a model, and coming up with a standard to shoot the clothing line. These decisions will impact the contract negotiations with the model agency. Typically, a full day rate for a model starts at around $2,500 plus 20% agency fees. This buys one year’s usage for internet only. In the event of going to print advertising, additional usage fees must be negotiated. Occasionally model agents will offer newer talent at lower rates, or they may be willing to negotiate lower fees for smaller brands that are still in their startup phase. One way that brands save money on model fees is by going “unrecognizable” for their e-commerce images. Unrecognizable saves money by cropping the image just under the model’s nose. This choice lowers the fees as the model’s face is not seen. For some brands this is a stylistic choice. Studies show that some buyers have an easier time selecting garments when they can’t see the model’s face. For others, unrecognizable may be perceived as a less elegant approach. It depends entirely on what standards have already been established on the website and what look the client feels is best for their customers.

Once the model is booked, it’s time to hire the crew. The hair and makeup artist that we book is an indispensable member of the team, and is chosen based on the model or models that we book. All artists will have their own style, and some will work more with men or with women, some will specialize in different skin tones. Some will be able to do both hair and makeup, but some are makeup only. If a makeup artist truly specializes in makeup only, they will be more accustomed to working on editorial fashion photo shoots. For artists who focus on e-commerce, they will be more used to doing both the hair and the makeup.

Equally important to the success of a shoot is the stylist. A stylist partners with the client representative and art director or creative director to implement the style guides unique to each brand. A made-to-measure menswear line is going to need dress shoes, ties, and belts whereas a surf line might need flip flops, sneakers, and caps. Once these decisions are communicated, the stylist will have a day in the budget for purchasing the styling pieces that will tie into and support the brands’ own pieces. Sometimes brands have all of these items in the line itself, and in that case the stylist may only need to pick up essentials such as socks, undergarments, and the like.

The stylist’s job the day of the shoot is to make the clothing look it’s best, both by preparing the garments for photography and by pairing the items together with shoes and accessories to express the style aesthetic of the brand. Brands vary on how they like to have their garments displayed, so in the event of line sheets provided with pre-determined pairings, the stylist will work with their assistant to make sure this direction is carried out. Stylists are selected by their specialties and typically work with an assistant who helps to keep the photo shoot moving forward in an organized way.

Other crew might include production assistants who help the shoot to succeed by taking care of all of the incidentals – assisting the producer by handling small jobs that pop up throughout the day and making any necessary runs whether it be for meals or last-minute supplies.

Typically the producer places crew on hold for planned shoot days until the details are fixed. Then a booking email goes out, and in advance of the shoot day itself, a call sheet providing details of call time, location, parking info, and anything else the crew may need to arrive on time and ready to work.

The Day of the Shoot

A typical photo shoot day is 10 hours start to finish, but a model’s contract stipulates 8 hours unless additional time has been negotiated with the model agency. With a call time of 7:30 am for the crew, the model arrives at 8 am. At 9 am we are set up and shooting light tests with the model. This gives us a chance to see the hair and makeup on camera and make decisions from there. Is the lip too bold? Do the brows need more of a lift? What looks good in person may not read the same on camera, so this is when we make final revisions. By 9:30 am we are in our first look of the day, and continue to shoot until noon. An hour break is taken for lunch, and the model is back in hair and makeup at 1. By 1:30 we are back on set and shooting until 5 pm.

A shoot day that stays on schedule is a shoot day that has been carefully planned and prepared for. The stylist may need a “style-out” ahead of the shoot day. This is in the budget to allow the stylist to get all of the garments organized and paired up with shoes and accessories so that the flow of the photo shoot can proceed efficiently. Some styling decisions can be made the day of, and with an assistant on set, steaming the garment prepping can happen throughout the day as well.

Identifying how many pieces we need to get through, how experienced our model is, and how elaborate the client’s style guide is allows the photographer to make an accurate prediction as to how many looks can be accomplished in a day. Even posing choices can wind up impacting the schedule. When it’s more important to get through numbers, it’s best to have a system in place that allows for quick progression. If capturing mood and unique poses for each garment is part of a client’s style guide, then they can expect less items to be shot in a day. Every shoot has it’s own priorities, and we work together as a team to generate the pictures that we need.

Trends come and go, but one thing that remains constant is the need for fashion photography that stands out from the rest. With a combination of creativity and technical expertise, professional fashion photographers create images that impress clients and inspire followers. Want to see some examples of editorial and e-commerce fashion photography? You can also visit Sonya Bowman Photography for ideas and inspiration.

One Light Wonder

In the blog “Drawing With Light,” I highlighted four qualities of sunlight that photographers should think about when starting to work with studio lights.

-Sunlight is bright. We talked about why a studio flash unit will give you better quality than continuous light ever could, and how it is a true necessity for a professional photographer. If you haven’t read “Drawing With Light,” this is your cue to do so now:
https://www.sonyabowman.com/photography-blog/2022/5/20/drawing-with-light

In this blog I’m going to talk about what we can do with that light. You may think that the mark of a stellar photographer is one who’s using every light in their kit, and certainly there are times when you will need multiple light sources, but before you can choreograph the lights to work together, you must understand the light itself. I recommend that when you are just starting out with studio lights, practice with only one light so that you can learn what that light can do. You will develop an understanding of the qualities of light and how different choices will impact the nature of the light, an essential step in mastering photography.

The most talented photographer I’ve worked with is best known for using only one light source. This style of photography has become popular in recent years, but when Manny Rodriguez was shooting entire ad campaigns with only one light in the early aughts, it was revolutionary. He was mimicking sunlight and letting the natural quality of light express itself. You can see some of his fantastic work on his website:

https://www.mannyrodriguez.com/

At that point in my career I still had a “more is more” type of attitude when it came to lights and photo gear in general. I’m kind of into the tech of it all, and seduced by the promise of all these cool gadgets. Manny’s question for me then, and even today, is why?

-Why place the light there? Light is directional. The place you put the light decides everything – where the shadow will land, which surfaces will be illuminated, how the light will strike the lens. Start noticing the lighting in pictures you see throughout the day on social media and elsewhere. Look at the shadow. What can you guess about where the light is based on the shadows?

In this image the light is moving from right to left. The right side of the items are illuminated, the shadow falls to the left.

This image was shot with a Profoto Acute 2 strobe head with a standard 7” reflector and barn doors. Note how much detail this bare bulb type of lighting captures, how crisp the shadows are from the solid items.

-Why use a light modifier? Light always casts a shadow. The shadow cast by the sun is a sharp shadow, with a crisp edge. If you want to mimic a high noon sun shadow, you’ll want to pull your light back as far as you can from your subject, and shoot either “bare bulb” (no modifier) or simply with the basic reflector that comes with the light. This reflector will amplify the light without changing the quality of the light too much.

But what about all those cool light shaping tools out there? Softboxes in all shapes and sizes, beauty dishes, scrims – and those are just the diffusers! The options are endless. To understand diffusers, think of sunlight going through clouds, or passing through an awning, Note that the shadow is much softer, sometimes almost disappearing altogether. This type of lighting can be very flattering on people. A dreary day may not do much to lift the mood of a vacationer in search of sunshine, but look at the pictures you take of people on cloudy days. Often these will be the most beautiful of portraits, because the blanket of light fills in all of the dark recesses and is far more universally flattering than a bright day. Applying this to product photography, the same rules apply. Less detail will be captured, but that’s not always a problem, depending on the item. Just as importantly, the shadows will be softer. Sometimes a hard shadow can be just too distracting, and implementing softboxes will provide lovely, even lighting, without a hard shadow.

In this image the light is coming from overhead and slightly in front of the object. The entire item is illuminated, the shadow falls just underneath and toward the back of the composition.

This image was shot with a Profoto D2 portable strobe head with a 2’x3’ Profoto softbox. Note how even the lighting is, how soft the shadow. For e-commerce photography, this look is a standard.

Comparing the diffusers to one another will be a subject of a future blog, but for the time being, you can start with what you have. Most lights will come with a basic umbrella. This is technically a reflector but softens the shadow like a diffuser by bouncing the light into a silver or white reflective umbrella. While this method of light may not offer the same amount of control as a diffusion scrim, it is certainly a tried and true method and will give a similar effect.

- Why does it matter where you set up your studio? When you are out and about on these streets, you will notice changes in the color of the light. Snap a pic in an office, and you’re looking at lurid green skin tones. Trying to catch a portrait on a partly cloudy day? You’ll be fighting sunspots the whole time.

A studio is a creative space, but it is also a technical space. Light bounces around, it picks up color. I set up my studio in the garage, which featured the dark, brown timber ceiling typical of the 40’s when this house was built. The first thing I did was to cover that ceiling with white fabric. I shoot a lot of jewelry, a lot of things with reflective surfaces, so I have to be super particular with the surroundings of my set,. Even if you are shooting people or clothing, you will want to be mindful that any surface your lights hit will throw their color into the mix, and it’s not something you want to be continually fighting.

In this image the light is coming from near the camera, just to the left. The entire item is nicely illuminated, yet there is dimension and detail. The shadow falls to the right and behind the item. The right side of the cube is left in shadow, while the top and left side and left a neutral grey.

This image was shot with a Profoto Acute 2 strobe head with a standard 7” reflector and barn doors. Over the platform I suspended a black card to darken down the top of the platform so that it would separate from the background better.

If you want to see examples of my photography, please check out my portfolio:

https://www.sonyabowman.com/

This blog includes reference to a one-light setup I use for one of my long-term clients, you can see more examples here:

https://www.sonyabowman.com/janessa-leone


Have a question or recommendation for a blog? Drop me a note:

https://www.sonyabowman.com/the-studio

Drawing With Light

Advancements in technology mean that almost anyone can take a good picture. That tiny computer you keep in your pocket – your smart phone – contains a digital camera and built-in suite of software that rivals professional digital cameras from only a decade ago.

Photography [ fuh-tog-ruh-fee ]

Drawing with light.

The word “photography” literally means “drawing with light.” The word was supposedly first coined by the British scientist Sir John Herschel in 1839 from the Greek words phos, (genitive: phōtós) meaning “light”, and graphê meaning “drawing or writing.” (Excerpt from Napoleon.org, link in footnotes)

As such, I would suggest that what separates a professional photographer from a hobbyist is someone who understands light and knows how to achieve a particular look with lighting. It’s more than taking pictures, it’s making pictures. It’s not just the camera, it is the lighting tools we use that demonstrate a true mastery of photography.

Early photographers only had the sun to draw with. Think of the sun. What qualities does sunlight have?

-Sunlight is directional. That means you can tell which direction the light comes from based on the shadow it casts.

-Sunlight casts a sharp shadow. Unless there are clouds or some kind of filtration (trees/awnings) overhead, the shadow cast by the sun will be clear and sharp.

-Sunlight’s color is impacted by atmosphere. On a clear, blue day, you will have clean, neutral color. As soon as clouds roll in, however, the color of the light is going to change. (Hint: it goes green) At sunrise and sunset, the sunlight is traveling through many more layers of atmosphere than at high noon. All of that moisture, dust, and pollen in the air shift the colors toward the warmer end of the spectrum, which is why sunset snapshots have that trademark golden hue. Take a photo of a person next to a neon pink wall, and you’ll notice your subject gains a pink highlight.

-Sunlight is bright. Even a brightly lit office building will never compete with the brightness of the sun, it only seems comparable because our eyes adjust to the difference. Even when the sun does not strike the subject, there is still plenty of light in the shade.

Let’s apply these qualities of the sun to studio photography.


This blog is going to focus on the last point, Sunlight is bright.


You will need good quality strobe lights if you really want to master studio photography. Continuous (video) lights may work for simple still life photography, but they just won’t cut it when it comes to capturing the quality you’re going for as a professional photographer. The difference between continuous light and strobe light comes down to the bulb. Continuous light, as the name implies, is on all the time. You can look through your camera and see what the light is doing. Strobe lights can be much, much brighter because the light is at its fullest intensity only at the time of the flash. The flash tube is surrounded by a continuous lightbulb that allows you to get an idea of what that light will do, but you have to shoot a picture to see what the flash can really do. With a continuous light in a dark studio, you will most likely be shooting at a high ISO, a slow shutter speed, and a wide open aperture as well. These settings will impact the quality. Using strobe lights allows you to utilize the full spectrum of your camera’s settings.

Creative still life photography requires the right tools to succeed. You’ll want to consider a variety of factors, but it’s an expensive enterprise so your main question may be price. Sometimes buying a small kit is the fastest way to get you up and running, but you should also consider how you will grow your kit down the line. There are many light shaping tools to explore, and investing in a good brand from the beginning will ensure that you have more options available to you later on.

Recommended strobe products:

If you are investing for the long haul,

go with Profoto. They do not come cheap, but it is the leading brand for professionals and will never let you down. Their accessories are industry standard, and they even have dual purpose light heads that provide strobe and bright continuous light, in case you think you’ll include video in your repertoire eventually. If your goal is to shoot advertising product photography, Profoto is the only way to go.

https://profoto.com/us

If you are looking for the most bang for your buck,

go with Paul C. Buff.

You won’t find these lights at retailers, but this direct-ship Nashville original offers a variety of strobe heads and light modifiers that will allow you to stock up a studio at a fraction of the price you would pay for Profoto. To illustrate the point, a replacement flash tube for an Alien Bee (one of the Buff brands) strobe unit costs $50. The last time I had to replace the flash tube for my Profoto Acute 2 head, it cost a breathtaking $600 dollars.

So why not just go all in on Alien Bees? For one thing, they don’t have the power of Profoto. That matters if you’re shooting jewelry or other things that require a macro lens. (More glass takes more light, but we’ll get into that later). For another, the output on less expensive strobe units tends not to be as consistent as Profoto, a major issue in a studio setting where you are dialing in the light to tenths of f-stops. The variations in output also impacts the color, and even slight shifts from frame to frame are a frustration for someone trying to perfect their craft. Still, it’s a solid lineup, and you could do a lot worse. If you plan to shoot fashion ecommerce photography, the Paul C. Buff lineup will get you there.

https://paulcbuff.com/

If you are looking for reliable lights at a reasonable price,

go with Photogenic. Their StudioMax III lineup is solid, and is a great way to jump into studio photography without breaking the bank. They are lightweight and portable, and while not nearly as powerful as Profoto, for photographers who are just getting started, they do the job perfectly well. I keep my old kit as backup, and still find niche uses for them, which will pop up in future blogs. Whether you want to shoot product photography or corporate headshots, you can get started with confidence using the Photogenic lights.

https://photogenic.com/

Where to buy

There are plenty of other options out there, these are simply the brands I have worked with and can recommend. I would advise you to get thee to a proper photography store and see the lighting equipment in person if possible. Photography stores can be intimidating spaces for newbies, so be prepared to wait for slow times before occupying the store personnel if you’re going to ask a hundred questions. Respect that they are there to serve professionals primarily, but as long as they have time, you’ll get the assistance you need.

You might also consider searching Craigslist or Facebook Marketplace to maximize your money. You’ll need to test the gear, so don’t meet up in a parking lot and buy out of some random person’s trunk. Plug the light in, give it a few tests. It probably won’t come with a manual, so ask for a demonstration. Photographers like myself periodically unload old gear as we update, and I’m always happy to pass well-loved studio equipment on to a new enthusiast.

I live in L.A. and like to support local business, so I go to Samy’s Camera for most of my day-to-day photography needs. They have seamless paper, gaffer’s tape, and all the basics, as well as lights, c-stands, sand bags, every light modifier you can think of, and of course cameras of all varieties. Samy’s has a number of locations around Los Angeles and sell online, but you can find your local pro shop by searching “professional camera store” and your city.

https://www.samys.com/

If Samy’s doesn’t have what I want, I go to B&H Photo out of New York. They have everything. All the things.

https://www.bhphotovideo.com

You could order from Amazon, but why would you give Jeff Bezos more money when he doesn’t even let his employees use the restroom?

To read more about the history of photography:

https://www.napoleon.org/en/young-historians/napodoc/the-birth-of-photography/#:~:text=The%20word%20%E2%80%9Cphotography%E2%80%9D%20literally%20means,meaning%20%E2%80%9Cdrawing%20or%20writing%E2%80%9D.

If you want to see examples of my still life photography:

https://www.sonyabowman.com/still-life

For my next blog I’m going to cover those other points about sunlight, and walk you through a one-light setup I use for one of my clients:

https://www.sonyabowman.com/janessa-leone

Have a question or recommendation for a blog? Drop me a note:

https://www.sonyabowman.com/the-studio